
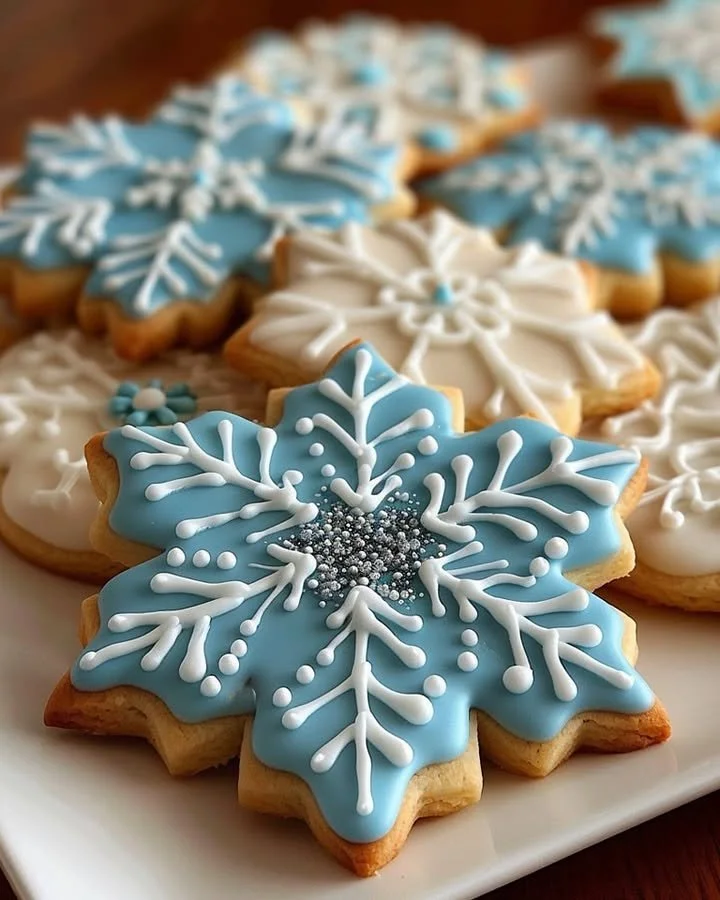
Snowflake Sugar Cookies embody the holiday spirit in every delightful bite. These cookies are a perfect blend of sweetness and nostalgia, with soft, buttery dough that melts in your mouth and a tender icing that adds a touch of whimsy. As you gather around your kitchen, the warm aroma of freshly baked cookies wafts through the air, enveloping everyone in a comforting embrace. Baking these cookies becomes not just a task but an experience filled with joy and creativity as you dive into this step-by-step recipe.
Crafted with love, Snowflake Sugar Cookies have a history that is as enchanting as their white, snowy décor. Originating from Eastern Europe, sugar cookies were traditionally baked during festive seasons, particularly Christmas. They’re a timeless treat passed down through generations, each cookie a symbol of family togetherness and celebration. The delicate snowflake shape carries connotations of winter wonder, and decorating these cookies has become a cherished activity that fosters creativity and communication among family and friends. Imagine each cookie representing a unique flake, all while you create a scenic winter wonderland on your baking sheet!
To create these enchanting Snowflake Sugar Cookies, gather the following ingredients that promise both flavor and imagination:
- 2 3/4 cups all-purpose flour, the cornerstone of our cookie, ensuring a flaky texture.
- 1 teaspoon baking powder, for elevating your cookies to fluffy perfection.
- 1/2 teaspoon salt, to balance the sweetness and enrich flavors.
- 1 cup unsalted butter, softened to creamy richness for a melt-in-your-mouth experience.
- 1 1/2 cups sugar, sweet and comforting, the heart of every cookie.
- 1 large egg, to bring all ingredients together in harmony.
- 1 teaspoon vanilla extract, a warm and inviting aroma.
- 1/2 teaspoon almond extract (optional), to add an additional layer of delicate flavor.
- 1 egg white (or 2 tablespoons meringue powder), for an airy royal icing.
- 1 1/2 cups powdered sugar, sweet and soft, creating a perfect icing texture.
- 1/2 teaspoon lemon juice, to cut the sweetness and brighten flavors.
- Food coloring (optional for decoration), your tool to unleash creativity.
Cooking these delightful cookies can be a quick or leisurely process. The quick preparation involves assembling your ingredients and baking in about an hour, perfect for spontaneous holiday gatherings. Slow preparation, on the other hand, allows you to savor every moment—perhaps gathering family to decorate each cookie together, enhancing the experience with laughter and storytelling around the kitchen countertop. For success, ensure your butter is softened (but not melted) for the ideal dough consistency, and chill the dough for a bit if it’s too soft to roll out.
Let’s dive into the step-by-step directions:
- Preheat the oven to 350°F (175°C). The anticipation builds as your kitchen warms up with its cozy ambiance.
- Line your baking sheets with parchment paper—this simple step ensures even baking and easy cleanup.
- In a medium bowl, whisk together the flour, baking powder, and salt, combining the dry ingredients that will soon form the base of your dough.
- In a large bowl, beat the softened butter and sugar together until light and fluffy, allowing the airy mixture to rise with the holiday spirit.
- Add the large egg along with the vanilla extract and almond extract (if using) to the butter-sugar mixture, mixing well until combined. Let this rich batter envelop your senses.
- Gradually introduce the whisked dry ingredients to the wet mixture, stirring until a cohesive dough forms. Feel the texture change as your whisk brings it all together.
- On a lightly floured surface, roll out the dough to about 1/4 inch thick, ensuring even flour distribution for a perfect cut.
- With a snowflake-shaped cookie cutter, press out your cookies, embracing the joy of creating beautiful shapes. Place these cutouts on the parchment-lined baking sheets.
- Bake in the preheated oven for 8-10 minutes or until the edges are lightly golden, allowing your kitchen to fill with the delightful scent of vanilla and butter.
- While they bake, prepare the royal icing. Whisk the egg white (or meringue powder) with lemon juice until soft peaks form, then slowly incorporate the powdered sugar until stiff peaks emerge. This icing is like sculpting with sugar!
- If desired, divide the icing into bowls and add food coloring, transforming your icing into a palette of winter hues.
- Once the cookies have cooled completely on a wire rack, use the royal icing to design intricate snowflake patterns, allowing your artistic flair to shine.
- Finally, let the icing dry completely before serving or packaging. The excitement builds as you admire your beautiful creations!
Serving these Snowflake Sugar Cookies becomes a celebration in itself. Whether placed on a festive platter for an upcoming gathering or presented in a charming box as gifts, they add a sweet touch to any occasion. Ideal for holiday festivities, winter parties, or cozy family gatherings, these cookies can even inspire a decorating contest for kids and adults alike. Share a plate of these charming treats with friends or keep them for cozy nights with hot cocoa—the options are endless!
However, even the most seasoned bakers can make mistakes. Common pitfalls while baking Snowflake Sugar Cookies include overmixing the dough, which can lead to tough cookies, or neglecting to cool the cookies completely before frosting. Be mindful of the dough’s thickness while rolling; if it’s too thick, the cookies may not hold their shape when baked.
Healthier alternatives can shine with these cookies as well. Consider substituting some of the all-purpose flour with whole wheat flour for a nutty flavor, or use coconut oil instead of butter for a different texture. For a fun variation, try adding different extracts or spices like cinnamon or nutmeg for an adventurous twist to the flavor profile. Spice enthusiasts could also incorporate finely chopped nuts or dried fruit into the dough for added texture and flavor.
FAQs for Snowflake Sugar Cookies:
Can I freeze Snowflake Sugar Cookies?
Yes, once baked and cooled, you can freeze them. Layer between parchment paper and store in an airtight container for up to three months.How do I ensure my cookies don’t spread too much?
Chill the dough for at least 30 minutes before rolling it out and baking the cookies.Can I use store-bought icing instead of making my own?
Absolutely! Store-bought icing can save time and is great for those who prefer a simpler approach.How do I know when my cookies are done?
Look for edges that are lightly golden—this typically means they’re ready to be taken out of the oven.Can I use egg substitutes in the royal icing?
Yes, you can use aquafaba (the liquid from canned chickpeas) or different meringue powders for a vegan option.What is the best way to store these cookies?
Store them in an airtight container at room temperature to keep them fresh and soft.
With Snowflake Sugar Cookies, you create more than just a treat; you craft memories filled with laughter, love, and togetherness. Allow the sweet aroma to fill your home, engaging all your senses in a tradition that welcomes warmth into the winter chill. Now is the perfect moment to gather your loved ones and try making these cookies—unleash the joy of baking and let the celebration begin!
Print
Snowflake Sugar Cookies
- Total Time: 25 minutes
- Yield: 24 servings 1x
- Diet: Vegetarian
Description
Delicious Snowflake Sugar Cookies that bring the holiday spirit to life with every delightful bite.
Ingredients
- 2 3/4 cups all-purpose flour
- 1 teaspoon baking powder
- 1/2 teaspoon salt
- 1 cup unsalted butter, softened
- 1 1/2 cups sugar
- 1 large egg
- 1 teaspoon vanilla extract
- 1/2 teaspoon almond extract (optional)
- 1 egg white (or 2 tablespoons meringue powder)
- 1 1/2 cups powdered sugar
- 1/2 teaspoon lemon juice
- Food coloring (optional for decoration)
Instructions
- Preheat the oven to 350°F (175°C).
- Line your baking sheets with parchment paper.
- Whisk together the flour, baking powder, and salt in a medium bowl.
- Beat the softened butter and sugar together in a large bowl until light and fluffy.
- Add the egg along with the vanilla and almond extract to the butter-sugar mixture and mix well.
- Gradually introduce the whisked dry ingredients to the wet mixture, stirring until a cohesive dough forms.
- Roll out the dough on a lightly floured surface to about 1/4 inch thick.
- Use a snowflake-shaped cookie cutter to press out your cookies and place them on the baking sheets.
- Bake for 8-10 minutes or until edges are lightly golden.
- Prepare the royal icing by whisking the egg white (or meringue powder) with lemon juice until soft peaks form, then slowly incorporate the powdered sugar until stiff peaks emerge.
- If desired, add food coloring to the icing.
- Once the cookies are cooled, decorate with royal icing.
- Let the icing dry completely before serving or packaging.
Notes
Chill the dough if it’s too soft to roll out for easier handling. You can freeze these cookies once baked and cooled.
- Prep Time: 15 minutes
- Cook Time: 10 minutes
- Category: Dessert
- Method: Baking
- Cuisine: American
Nutrition
- Serving Size: 1 cookie
- Calories: 130
- Sugar: 9g
- Sodium: 50mg
- Fat: 6g
- Saturated Fat: 4g
- Unsaturated Fat: 2g
- Trans Fat: 0g
- Carbohydrates: 17g
- Fiber: 0g
- Protein: 1g
- Cholesterol: 20mg


