
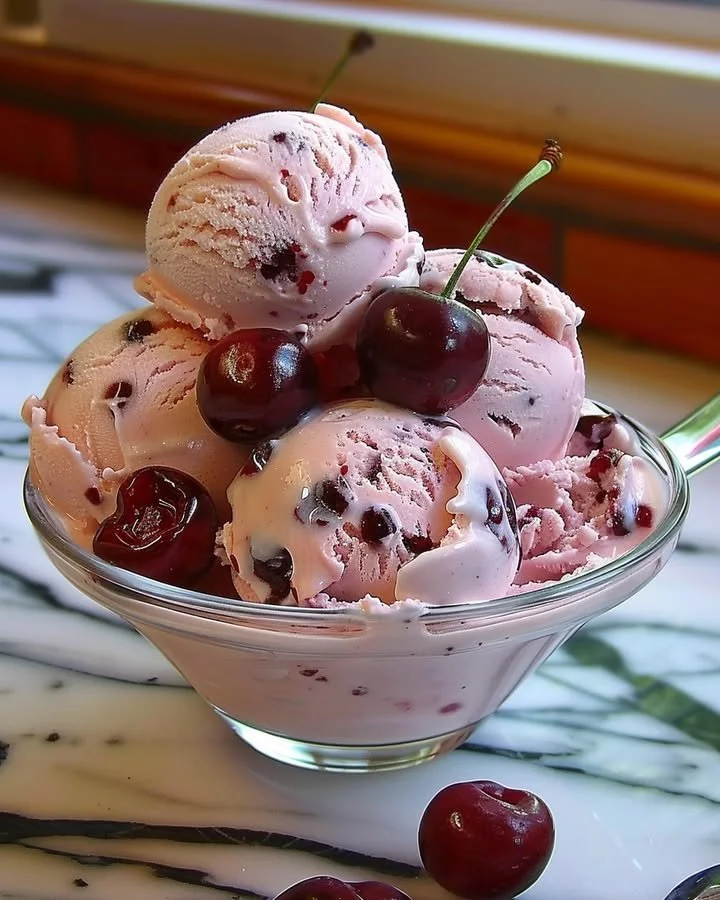
Homemade Cherry Ice Cream
Imagine the vibrant taste of summer captured in a single creamy scoop – that’s exactly what Homemade Cherry Ice Cream offers! This delightful recipe takes you on a step-by-step journey through the art of capturing the essence of ripe cherries, blended into a luscious base of rich cream and velvety milk. From the moment you begin to prepare this treat, the sweet aromas of cherries waft through your kitchen, evoking memories of carefree summer days. You can almost hear laughter shared over bowls of this decadent ice cream, where each bite brings joy and nostalgia.
History / Fun Fact
Cherry ice cream has a storied past, beloved across cultures and epochs. This delightful dessert is thought to have originated in Europe, where ice creams were crafted as luxurious indulgences for the aristocracy centuries ago. The first documented recipe for cherry ice cream appeared around the 18th century, praised for its exquisite flavor and vibrant color. Interestingly, in the United States, cherry ice cream found its own identity through the development of local cherry orchards, especially in regions like Michigan and Washington. Over time, the treat evolved from simple homemade creations to the beautifully crafted desserts we enjoy today, celebrating both cherry harvests and summer gatherings.
Ingredients
To prepare this delicious Homemade Cherry Ice Cream, you’ll need:
- 2 cups of tender, sweet cherries, pitted and halved; these gems will infuse your ice cream with natural sweetness and vibrant red color.
- 1 cup of heavy cream, creating a rich, velvety texture that makes each scoop a dreamy experience.
- 1 cup of whole milk, adding a creamy body that balances the richness of the heavy cream.
- 3/4 cup of granulated sugar, which will sweeten and enhance the flavor of the cherries, making them pop with sweetness.
- 1 teaspoon of vanilla extract, bringing depth and a comforting aroma that intertwines beautifully with the cherries.
- A pinch of salt, which heightens the flavors and makes the sweetness shine even brighter.
Cooking Time & Tips For Homemade Cherry Ice Cream
When you’re making Homemade Cherry Ice Cream, preparation can be quick or slow, depending on your approach. A quick approach uses an ice cream maker, allowing you to churn the mixture rapidly. This method can produce a smooth and creamy texture but requires a bit of planning ahead—freezing the ice cream maker bowl requires several hours.
On the other hand, a slow preparation method, where the mixture is allowed to set and freeze over longer periods, can lead to a delightfully creamy texture, but it requires patience. Practical tips include ensuring your cherries are ripe for maximum flavor, using fresh ingredients, and tasting the mixture as you go to tailor the sweetness to your liking.
Step-by-Step Directions
Start your cherry ice cream adventure by tossing the pitted and halved cherries into a medium bowl with 1/4 cup of sugar. The magic begins here as the sugar gently coax the juices from the cherries, allowing them to sit for about 30 minutes to macerate. This step enhances their natural sweetness, making the flavor truly delightful, as they become tender and aromatic.
In a separate bowl, combine a symphony of textures – whisk together the heavy cream and whole milk, creating a rich base. Add the remaining sugar, along with vanilla extract and a pinch of salt. As you mix, listen for that gentle sound of the whisk at work, ensuring that the sugar dissolves completely, resulting in a luscious and inviting mixture that beckons to be tasted.
Once your cherries are perfectly macerated, it’s time for a beautiful union. Gently fold the cherry mixture into the creamy concoction. As you stir, watch the colors mingle and swirl together, creating a visual feast that mirrors the delightful flavor harmony to come.
Now, pour this exquisite mix into your ice cream maker, where the transformation begins! Churn according to the manufacturer’s instructions until your ice cream achieves a soft-serve consistency. Feel the excitement build as the mixture thickens and cools in your ice cream maker, filling your kitchen with a sweet and enticing aroma.
When you’ve reached that delightful soft-serve texture, it’s time to transfer your creation into a lidded container. This is where patience pays off: pop it in the freezer for at least 4 hours, allowing the ice cream to firm up to the perfect scooping consistency. Just imagine the anticipation building as you wait.
Finally, the moment of truth arrives! Scoop your homemade cherry ice cream into a bowl or cone, and savor the sweet, creamy goodness. Each bite bursts with flavor, and that creamy texture dances on your palate, leaving you yearning for more.
Serving Suggestions & Occasions
Homemade Cherry Ice Cream is a versatile dessert that shines on various occasions. Serve it as a refreshing treat on a hot summer day or as a perfect ending to a festive gathering. Consider pairing it with a drizzle of chocolate sauce, topping it with chopped nuts, or accompanying it with warm brownies or pie. It also makes a delightful addition to birthday celebrations, family picnics, or simply a cozy movie night at home.
Common Mistakes For Homemade Cherry Ice Cream
One common pitfall is not allowing the cherries to macerate long enough, which can result in a less flavorful mixture. Additionally, failing to fully dissolve the sugar in the cream mixture may lead to a grainy texture. Another mistake is not chilling your ice cream maker bowl adequately; a warm bowl will impede the ice cream’s ability to set correctly. Lastly, over-churning can lead to icy ice cream rather than the desired creamy texture, so keep an eye on the process!
Healthier Alternatives & Variations
For a healthier twist on Homemade Cherry Ice Cream, consider substituting heavy cream with coconut cream for a dairy-free version. Additionally, you can reduce sugar by using natural sweeteners like honey or agave syrup, or even explore using ripe bananas as a creamy base. To mix things up, try incorporating other fruits like strawberries or blueberries for a berry medley or swirl in a hint of chocolate for a rich, chocolate-cherry experience.
FAQs
Can I use frozen cherries instead of fresh ones?
Yes, frozen cherries can be used; just ensure they are thawed and drained before using.How long does homemade cherry ice cream last in the freezer?
Homemade cherry ice cream can last up to 2 weeks in the freezer, but for the best flavor and texture, enjoy it sooner!Do I need an ice cream maker for this recipe?
While an ice cream maker is recommended, you can also make it without one by stirring the mixture every 30 minutes while freezing until creamy.Can I use almond milk instead of whole milk?
Yes, but keep in mind that the flavor and texture may differ slightly. Choose a creamy variety for best results.What’s the best way to scoop ice cream from the freezer?
Use a warm ice cream scoop dipped in hot water for smooth, easy scooping!Can I add toppings or mix-ins after churning?
Absolutely! You can fold in chocolate chips, nuts, or other fruits just before the ice cream reaches soft-serve consistency.
Conclusion
Now that you’ve discovered the delectable adventure of making Homemade Cherry Ice Cream, don’t hesitate to dive in and create your own batch. The blend of fresh cherries and creamy goodness awaits you, promising a treat that transcends seasons. Treat yourself and your loved ones to this delightful indulgence—it’s time to savor the sweetness of summer in every luscious scoop!
Print
Homemade Cherry Ice Cream
- Total Time: 270 minutes
- Yield: 4 servings 1x
- Diet: Vegetarian
Description
Delight in the taste of summer with this creamy Homemade Cherry Ice Cream, capturing the essence of ripe cherries blended into a luscious base of rich cream and milk.
Ingredients
- 2 cups of tender, sweet cherries, pitted and halved
- 1 cup of heavy cream
- 1 cup of whole milk
- 3/4 cup of granulated sugar
- 1 teaspoon of vanilla extract
- A pinch of salt
Instructions
- Toss the cherries with 1/4 cup of sugar in a medium bowl and let sit for about 30 minutes to macerate.
- Whisk together the heavy cream and whole milk in a separate bowl, adding remaining sugar, vanilla extract, and a pinch of salt.
- Fold the macerated cherries into the creamy mixture.
- Pour the mixture into your ice cream maker and churn according to the manufacturer’s instructions until soft-serve consistency is achieved.
- Transfer the ice cream to a lidded container and freeze for at least 4 hours to firm up.
- Scoop and enjoy your homemade cherry ice cream in a bowl or cone!
Notes
Ensure cherries are ripe for maximum flavor; taste the mixture to adjust sweetness as desired.
- Prep Time: 30 minutes
- Cook Time: 240 minutes
- Category: Dessert
- Method: Churning
- Cuisine: American
Nutrition
- Serving Size: 1 serving
- Calories: 250
- Sugar: 22g
- Sodium: 50mg
- Fat: 14g
- Saturated Fat: 8g
- Unsaturated Fat: 4g
- Trans Fat: 0g
- Carbohydrates: 29g
- Fiber: 1g
- Protein: 3g
- Cholesterol: 45mg


