
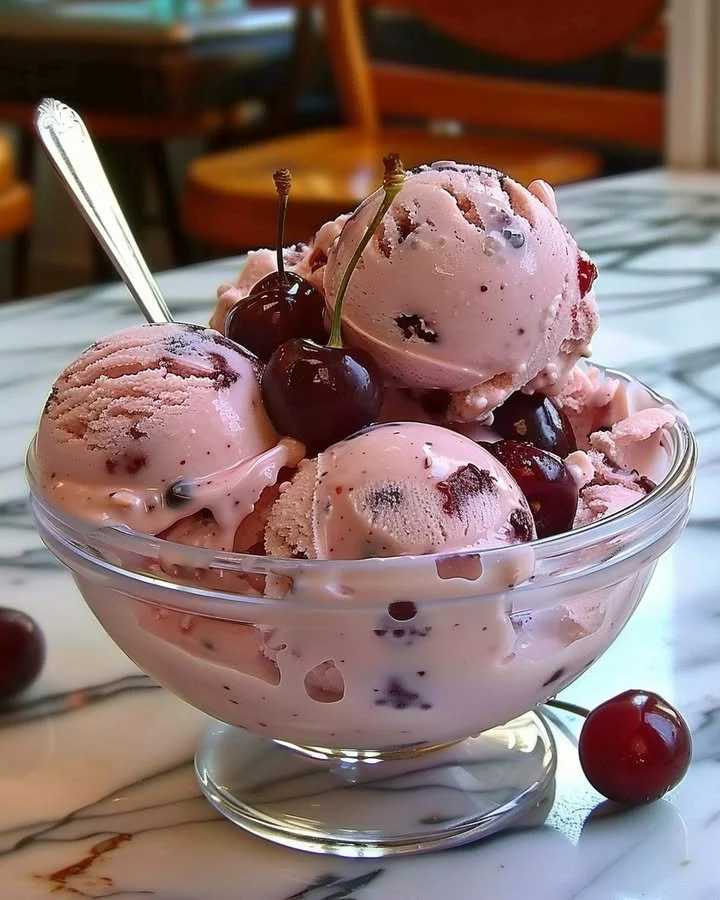
Homemade Cherry Ice Cream
The vibrant color and tantalizing aroma of homemade cherry ice cream can invoke feelings of childhood summers spent under the sun, where laughter blended with the sweet scent of ripe cherries. This recipe is a step-by-step guide to creating creamy, dreamy cherry delight, perfect for satisfying those sweet cravings or simply to bring a bit of joy into your day. Imagine scooping into a bowl filled with luscious, velvety smooth ice cream studded with bursts of fresh cherry goodness.
History / Fun Fact
Ice cream has been enjoyed in various forms for centuries, with roots tracing back to ancient China, where a mixture of milk and rice was packed in snow. However, the cherry-flavored variety finds its true roots in America, where locals began to cultivate cherry orchards in the 1600s. Fun fact: in the United States, cherry ice cream is a favorite summer treat for many, thanks to its refreshing taste and vibrant hue. With every bite of your homemade cherry ice cream, you will be partaking in a delicious tradition that has brought joy to generations.
Ingredients
For this delectable homemade cherry ice cream, you will need the following ingredients:
- 2 cups heavy cream (rich and creamy, providing a luxurious texture)
- 1 cup whole milk (adds a smooth, silky consistency)
- 3/4 cup granulated sugar (sweet, balancing the tartness of the cherries)
- 1 teaspoon vanilla extract (aromatic, enhancing the overall flavor profile)
- 2 cups fresh cherries, pitted and chopped (juicy, sweet, and bright)
- 1 tablespoon lemon juice (tangy, preserves the cherries’ beautiful color)
- 1/2 teaspoon almond extract (optional, for an extra nutty layer)
- 1 tablespoon cornstarch (optional, giving thickness and creaminess)
With these ingredients on hand, you are embarking on a sensory journey where sweet and tart harmonize beautifully in this delightful treat.
Cooking Time & Tips for Homemade Cherry Ice Cream
The best part about making homemade cherry ice cream is the flexibility you have with preparation. Quick preparation involves mixing and churning without allowing the flavors to meld extensively, perfect for when you’re in a hurry. Slow preparation, however, allows the cream and milk to settle into a luscious mixture, enhancing flavors over time. To elevate your ice cream, take your time when combining ingredients, and allow them to cool thoroughly before churning.
Here are some practical tips for success: use fresh, ripe cherries for the best flavor, ensure your ice cream maker is thoroughly chilled before use, and be patient when freezing the mixture to achieve that perfect scoopable consistency.
Step-by-Step Directions
Begin the delightful journey by combining 2 cups of rich heavy cream, 1 cup of whole milk, and 3/4 cup of granulated sugar in a medium saucepan. As the mixture heats slowly over medium heat, take a moment to revel in the creamy texture as you stir occasionally, ensuring the sugar dissolves completely.
While waiting, mix 1 tablespoon of cornstarch with 2 tablespoons of milk in a small bowl, creating a slurry. This optional step will bring a beautiful thickening effect to your ice cream.
Gradually stir the cornstarch slurry into the warm cream mixture. Keep stirring constantly as the mixture thickens slightly over about 5-7 minutes. When you notice a subtle change in texture and the mixture clings to the spoon, it’s time to remove it from the heat.
Add 1 teaspoon of aromatic vanilla extract and, if you choose, 1/2 teaspoon of almond extract to deepen the flavor. Set the mixture aside to cool to room temperature, allowing the aroma to fill your kitchen.
While waiting for the cream to cool, prepare the cherries. In a bowl, toss the chopped cherries with 1 tablespoon of lemon juice. This ensures they retain their vibrant color and intensifies their natural sweetness, which will beautifully balance the ice cream.
Once the cream mixture has cooled, pour it into your ice cream maker. Churn according to the manufacturer’s instructions—this is where the magic happens as it transforms into a creamy delight.
After the churning process, gently fold the prepared cherries into the ice cream, spreading their gorgeous sweetness evenly throughout.
Transfer the mixture into an airtight container and freeze for at least 4 hours or until it reaches a firm consistency. The anticipation will be worth it!
Finally, serve your homemade cherry ice cream in bowls or cones, garnished with a sprig of mint if desired. Enjoy the blissful combination of flavors as you indulge in every delightful bite.
Serving Suggestions & Occasions
Homemade cherry ice cream is the ultimate summer treat, perfect for outdoor barbecues, birthday celebrations, or cozy family dinners. Serve it alongside warm peach cobbler or chocolate cake for an amazing dessert duo. Alternatively, for a refreshing snack, enjoy it on a sunny day while lounging on the porch. The luscious cherry ice cream can also be transformed into shakes or sundaes adorned with whipped cream, crushed nuts, or chocolate syrup, emphasizing its versatility.
Common Mistakes for Homemade Cherry Ice Cream
A few missteps can lead to less-than-stellar ice cream results. Make sure to avoid:
- Using overripe or mushy cherries that lose texture and flavor during freezing.
- Not allowing the cream mixture to cool before churning, risking an uneven consistency.
- Forgetting to churn the ice cream long enough, resulting in a grainy texture.
- Skipping the optional cornstarch, which can prevent a creamy result.
Take your time and follow the steps carefully to ensure a creamy, sweet creation!
Healthier Alternatives & Variations
For a lighter version of cherry ice cream, consider substituting heavy cream with coconut cream or Greek yogurt. They still provide creaminess while offering a healthier twist. Using honey or maple syrup instead of granulated sugar can also give your ice cream a unique flavor profile. If you want to experiment, try adding dark chocolate chunks or blending in some almond butter for added richness. For a dairy-free version, you can substitute all dairy ingredients with coconut milk and almond milk, keeping the cherry flavor intact.
FAQs
Can I use frozen cherries instead of fresh?
Yes, frozen cherries can be used, but make sure to thaw and drain excess liquid to prevent a watery texture.How long does homemade cherry ice cream last in the freezer?
It can last for about 2-3 weeks, stored in an airtight container.Can I make this recipe without an ice cream maker?
Yes! You can place the mixture in a tight container and stir vigorously every 30 minutes for the first few hours before letting it freeze solid.What if my ice cream is too soft?
If your ice cream is too soft, it may need more time to freeze, or you may need to churn it longer to incorporate enough air.How can I enhance the cherry flavor?
You can enhance the cherry flavor by adding cherry extract or a splash of pure cherry juice to the mixture.Is there a way to make this recipe vegan?
Absolutely! Substitute dairy products with coconut cream, almond milk, and use agave syrup instead of sugar.
Conclusion
There’s nothing quite like indulging in homemade cherry ice cream, where every bite is infused with sweet memories and vibrant flavors. With this simple, step-by-step recipe, you can bring joy to your kitchen and delight friends and family with your creation. Don’t wait any longer; gather your ingredients and let the journey begin—your taste buds will thank you!
Print
Homemade Cherry Ice Cream
- Total Time: 240 minutes
- Yield: 6 servings 1x
- Diet: Vegetarian
Description
A delightful homemade cherry ice cream that is creamy and rich, perfect for summer treats and satisfying sweet cravings.
Ingredients
- 2 cups heavy cream
- 1 cup whole milk
- 3/4 cup granulated sugar
- 1 teaspoon vanilla extract
- 2 cups fresh cherries, pitted and chopped
- 1 tablespoon lemon juice
- 1/2 teaspoon almond extract (optional)
- 1 tablespoon cornstarch (optional)
Instructions
- Combine 2 cups of heavy cream, 1 cup of whole milk, and 3/4 cup of granulated sugar in a medium saucepan.
- Heat the mixture over medium heat, stirring occasionally until the sugar dissolves.
- Mix 1 tablespoon of cornstarch with 2 tablespoons of milk to create a slurry.
- Stir the cornstarch slurry into the warm cream mixture and cook until it thickens slightly.
- Remove the mixture from heat and add 1 teaspoon of vanilla extract and 1/2 teaspoon of almond extract.
- Cool the mixture to room temperature.
- Toss the chopped cherries with 1 tablespoon of lemon juice.
- Pour the cooled cream mixture into your ice cream maker and churn according to instructions.
- Fold in the cherries after churning.
- Freeze the mixture in an airtight container for at least 4 hours.
- Serve the ice cream in bowls or cones, optionally garnished with mint.
Notes
Use fresh, ripe cherries for the best flavor. Allow the mixture to cool thoroughly before churning for the best results.
- Prep Time: 15 minutes
- Cook Time: 15 minutes
- Category: Dessert
- Method: Churning
- Cuisine: American
Nutrition
- Serving Size: 1 serving
- Calories: 250
- Sugar: 20g
- Sodium: 80mg
- Fat: 15g
- Saturated Fat: 8g
- Unsaturated Fat: 7g
- Trans Fat: 0g
- Carbohydrates: 28g
- Fiber: 1g
- Protein: 3g
- Cholesterol: 55mg


