
Is there anything more heartwarming, more deeply satisfying than a slice of truly exceptional, warm homemade apple pie? This isn’t just any homemade apple pie recipe; this is the recipe.
The one that conjures images of cozy kitchens, holiday gatherings, and the pure bliss of a perfectly baked dessert.
Forget store-bought imposters; we’re diving deep into crafting an apple pie from scratch, complete with a ridiculously flaky, buttery crust and a tender, cinnamon-kissed apple filling that will make your sweet tooth sing. Get ready to create a nostalgia-inducing masterpiece.
Ingredients: Your Toolkit for Apple Pie Perfection
Gathering your ingredients is the first step towards pie nirvana. Think quality, think flavor, think comfort.
For that Unbelievably Flaky All-Butter Crust:
| Ingredient | Amount | Sensory/Emotional Hook |
|---|---|---|
| All-Purpose Flour | 2 ½ cups | The sturdy foundation for our edible masterpiece. |
| Granulated Sugar | 1 tsp | Just a whisper of sweetness to balance the butter. |
| Salt | 1 tsp | Enhances all the gorgeous flavors. |
| Unsalted Butter | 1 cup (2 sticks) | VERY cold and cubed! This is the secret to those incredible flaky layers. Pure gold! |
| Ice Water | ½ cup | Shockingly cold – essential for keeping that butter solid and creating steam pockets. |
| Apple Cider Vinegar | 1 tsp | Our little secret for an ultra-tender crust (optional, but recommended!). |
For the Gloriously Spiced Apple Filling:
- Apples: 6-7 medium apples (about 3 lbs). Use a mix! Honeycrisp and Granny Smith are a dream team – Honeycrisp for sweetness and texture, Granny Smith for that essential tartness that cuts through the richness. Imagine crisp, juicy slices waiting to be transformed.
- Lemon Juice: 1 tbsp. Keeps those apples bright and adds a crucial zing.
- Granulated Sugar: ½ cup (adjust to taste and apple sweetness). The sweet embrace your apples crave.
- Brown Sugar: ¼ cup, packed. For that lovely hint of molasses and caramel depth.
- All-Purpose Flour: 2 tbsp. To thicken those glorious juices into a luscious sauce, not a runny mess.
- Ground Cinnamon: 1 ½ tsp. The quintessential aroma of comfort and warmth.
- Ground Nutmeg: ¼ tsp. A warm, nutty whisper that complements the cinnamon beautifully.
- Pinch of Ground Cloves: Optional, but adds a lovely festive depth.
- Salt: ¼ tsp. Balances the sweetness and makes the apple flavor pop.
- Unsalted Butter: 2 tbsp, cut into small pieces. Dotted over the filling before baking for extra richness. Oh, the decadence!
- Egg Wash: 1 large egg whisked with 1 tbsp milk or water. For that picture-perfect, glossy golden-brown finish.
- Coarse Sugar (like Turbinado): For sprinkling. Adds a delightful sugary crunch and sparkle.
Timing: Quick Comfort or Luxurious Indulgence?
This classic homemade apple pie rewards a little patience, but you can manage the time.
- Active Prep Time: Around 45-60 minutes (making dough, peeling/slicing apples, assembling). This is your hands-on, creative time!
- Chill Time: Crucial! Minimum 1 hour for the dough (longer is better!). This lets the gluten relax and the butter firm up = FLAKINESS.
- Bake Time: 50-60 minutes. The glorious transformation in the oven.
- Cooling Time: Essential! At least 2-3 hours. This allows the filling to set properly. Resist the urge to slice too soon!
You can make the dough a day or two ahead (even freeze it!), breaking up the process. But for the full, luxurious experience? Block out an afternoon, put on some music, and enjoy the mindful process of creating this easy dessert from scratch.
Step-by-Step: Crafting Your Apple Pie Masterpiece
Making the Flaky All-Butter Pie Crust
Combine Dry: In a large bowl, whisk together the flour, sugar, and salt.
Cut in Butter: Add the very cold, cubed butter. Using a pastry blender, your fingertips, or a food processor (pulse carefully!), cut the butter into the flour until the mixture resembles coarse meal with some pea-sized (and even slightly larger) lumps of butter remaining. These lumps are your flaky friends! Don’t overwork it.
Add Ice Water Mixture: In a small bowl, combine the ice water and apple cider vinegar (if using). Gradually drizzle the ice water mixture over the flour mixture, a tablespoon at a time, mixing gently with a fork or spatula until the dough just starts to come together. You might not need all the water. Stop as soon as it holds together when squeezed – it shouldn’t be wet or sticky.
Divide and Chill: Turn the dough out onto a lightly floured surface and gently bring it together. Divide the dough in half, flatten each half into a disk, wrap tightly in plastic wrap, and refrigerate for at least 1 hour (or up to 2 days). Chilling is non-negotiable for a flaky homemade apple pie recipe crust!
Preparing the Luscious Apple Filling
- Prep Apples: Peel, core, and slice your apples relatively thinly (about ¼-inch thick). Consistency helps them cook evenly. Place them in a large bowl.
- Add Flavor: Gently toss the apple slices with the lemon juice. In a separate, smaller bowl, whisk together the granulated sugar, brown sugar, flour, cinnamon, nutmeg, optional cloves, and salt.
- Combine: Pour the sugar-spice mixture over the apples and toss gently but thoroughly to coat every slice. Let the mixture sit for about 15-20 minutes while you roll out the crust. This helps the apples release some juices, allowing the flour to start its thickening magic.
Assembling Your Dream Apple Pie
Preheat & Prep Pan: Preheat your oven to 400°F (200°C). Have a 9-inch pie dish ready.
Roll Bottom Crust: On a lightly floured surface, roll out one disk of chilled dough into a 12-inch circle, about ⅛-inch thick. Carefully transfer it to your pie dish. Gently press it into the bottom and up the sides. Trim the excess dough, leaving about a ½-inch overhang.
Fill ‘Er Up: Spoon the glorious apple filling into the crust-lined pie dish, mounding it slightly in the center. Dot the top of the filling with the small pieces of butter. That extra richness? Yes, please.
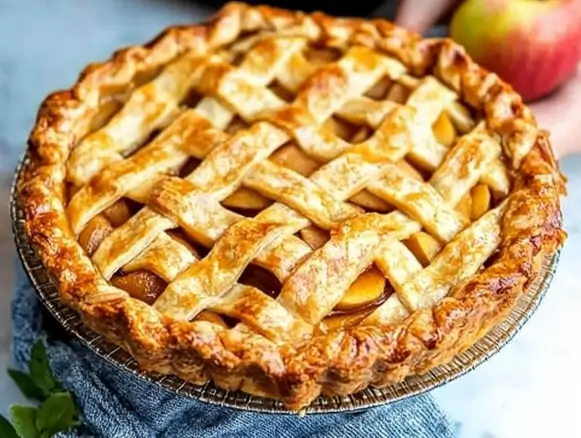
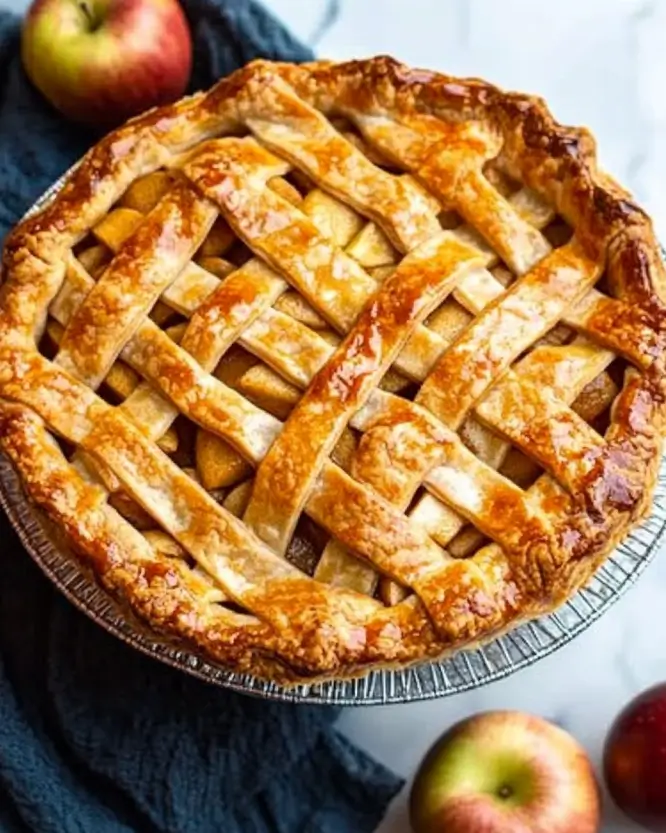
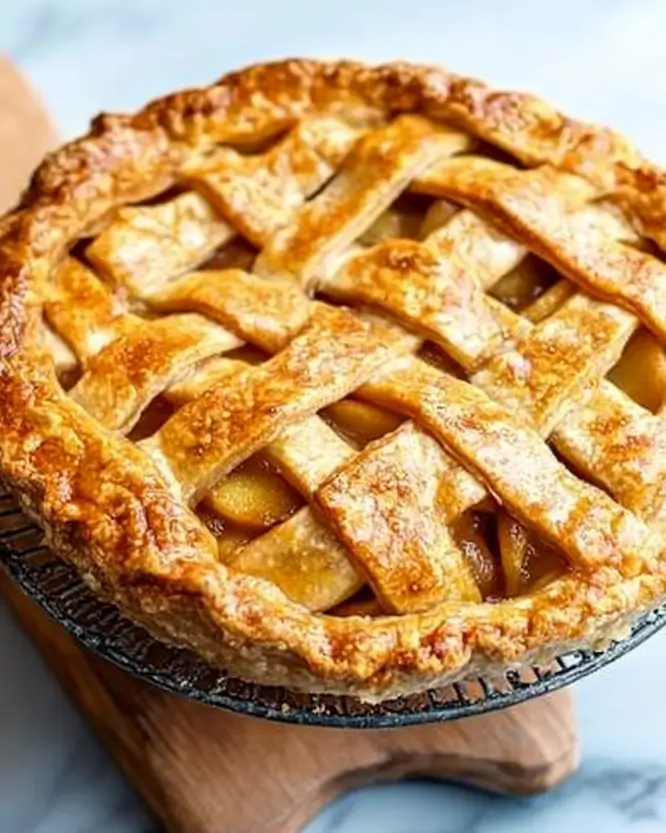
Roll Top Crust: Roll out the second disk of dough similarly. You can either place it whole over the filling or cut it into strips for a lattice top (a classic look for this apple pie from scratch recipe!).
Seal & Crimp: If using a whole top crust, place it over the filling. Trim the excess dough, leaving a ½-inch overhang. Fold the top crust edge under the bottom crust edge. Crimp the edges decoratively using your fingers or a fork to seal the pie completely. If making a lattice, weave the strips over the filling, pressing the ends onto the bottom crust edge before crimping.
Vent: If using a solid top crust, cut several slits in the top to allow steam to escape. This prevents a soggy bottom and filling explosions!
Egg Wash & Sugar: Brush the top crust (and lattice, if using) evenly with the egg wash. Sprinkle generously with coarse sugar for that irresistible sparkle and crunch.
Bake to Golden Perfection: Place the pie on a baking sheet (to catch any potential drips – trust me!). Bake at 400°F (200°C) for 20 minutes. Then, reduce the oven temperature to 375°F (190°C) and continue baking for another 30-40 minutes, or until the crust is deeply golden brown and the filling is bubbling thickly through the vents. If the crust starts browning too quickly, loosely tent the edges with aluminum foil.
Cool Completely: This is the hardest part! Transfer the baked pie to a wire rack and let it cool completely for at least 2-3 hours before slicing and serving. This allows the gooey, delicious filling to set properly. Patience yields the perfect slice!
Nutritional Information (Approximate)
A slice of this magnificent homemade apple pie recipe (assuming 8 slices per pie) typically contains around 400-500 calories, depending on the exact ingredients and size of the slice. It’s definitely an indulgence, packed with butter, sugar, and delicious apples.
Remember, it’s a holiday treat or special occasion dessert – meant to be savored! Enjoy it mindfully as part of a balanced approach.
Healthier Alternatives & Swaps
Want to lighten things up slightly?
- Sugar: Reduce the total sugar in the filling by ¼ to ½ cup, especially if using sweeter apples. You could also experiment with natural sweeteners like maple syrup or date paste (adjust thickening agent accordingly).
- Crust: While the all-butter crust is iconic, you could substitute half the butter with vegetable shortening for flakiness with a slightly different fat profile, or explore whole wheat pastry flour for part of the all-purpose flour (this will change the texture and flavor). A dairy-free version requires using solid vegan butter sticks (very cold!). Oil-based crusts are possible but won’t yield the same flaky layers.
- Filling: Boost the fiber by leaving the peels on some of the apples (ensure they are well-washed). Focus on naturally sweet apples to minimize added sugar.
Dreamy Serving Suggestions
This easy dessert shines on its own, but why stop there?
- Classic: A generous scoop of high-quality vanilla bean ice cream melting into the warm pie is pure heaven.
- À La Mode Twist: Try salted caramel ice cream or even cinnamon ice cream.
- Creamy: A dollop of freshly whipped heavy cream (unsweetened or lightly sweetened).
- Sharp Cheddar: A surprisingly delicious traditional pairing! A thin slice of sharp cheddar cheese alongside or melted on top provides a savory counterpoint.
- Holiday Treat Perfection: Serve warm as the grand finale to Thanksgiving, Christmas, or any festive meal. It’s guaranteed to gather everyone around the table.
- Cozy Afternoon: Enjoy a slice with a cup of hot coffee or spiced cider on a chilly day.
Common Apple Pie Pitfalls (& How to Avoid Them!)
Even the best bakers encounter issues. Here’s how to navigate common problems with this homemade apple pie recipe:
- Soggy Bottom Crust: Ensure your filling isn’t too watery (letting the apples sit helps), don’t skip venting the top crust, and consider baking the pie on a lower rack initially or on a preheated baking stone/steel to help crisp the bottom. Make sure you bake it long enough!
- Runny Filling: Use enough thickener (flour or cornstarch), let the apples macerate with the sugar/flour mix before filling, and MOST importantly, let the pie cool completely before slicing.
- Tough Crust: Don’t overwork the dough when adding water or rolling it out. Keep everything COLD. Overmixing develops gluten, leading to toughness instead of flakiness.
- Over-Browning Crust: Tent the edges with foil partway through baking if they’re getting too dark before the center is done.
- Shrunken Crust: Avoid stretching the dough when placing it in the pie dish. Let it relax into the pan. Ensure the dough has chilled sufficiently.
- Messy Oven: Always bake your pie on a baking sheet! Bubbling filling can and often does drip.
Storing Your Precious Pie
- Room Temperature: Apple pie is generally safe at room temperature for up to 2 days, loosely covered (a clean tea towel works well – plastic wrap can make the crust soggy).
- Refrigerator: For longer storage (up to 4-5 days), cover the pie loosely and store it in the refrigerator.
- Freezing Baked Pie: Yes! Cool the pie completely. Wrap it tightly in several layers of plastic wrap, followed by a layer of aluminum foil or place it in a large freezer bag. Freeze for up to 3-4 months.
- Reheating: To reheat a whole pie (from fridge or thawed from frozen), place it in a 350°F (175°C) oven for 15-25 minutes, or until warmed through. Cover edges with foil if needed. For individual slices, microwave briefly (15-30 seconds) or warm in a toaster oven or regular oven until heated to your liking.
Your Turn to Bake Some Magic!
There you have it – everything you need to master the best homemade apple pie recipe you’ve ever tasted.
Imagine the aroma filling your home, the golden, flaky crust yielding to your fork, revealing that warm, perfectly spiced apple filling. It’s more than just dessert; it’s comfort, it’s celebration, it’s pure, unadulterated joy baked into a pie dish.
Don’t let your sweet tooth wait any longer. Preheat that oven, grab your apples, and prepare to fall in love with baking all over again. Happy pie making!
Frequently Asked Questions (FAQs)
Q: Can I use a different type of flour for the crust, like almond or gluten-free?
A: You can experiment, but this specific homemade apple pie recipe is optimized for all-purpose flour’s gluten structure, crucial for flakiness. Gluten-free blends (ensure they contain xanthan gum) or almond flour will result in a different texture – likely more crumbly or shortbread-like rather than flaky. You’ll need to adjust liquid amounts and handling techniques significantly.
Q: Can I freeze the unbaked apple pie?
A: Absolutely! Assemble the entire pie but don’t cut vents or apply the egg wash. Wrap it extremely well (multiple layers of plastic wrap and foil) and freeze for up to 3 months. Bake directly from frozen – do not thaw! Add the egg wash and cut vents right before baking. You’ll need to add 15-25 minutes to the total baking time.
Q: What are the best apples for this homemade apple pie recipe?
A: A mix is ideal for complex flavor and texture! Firm-tart apples like Granny Smith hold their shape and provide tang. Pair them with firm-sweet apples like Honeycrisp, Braeburn, Jonagold, or Gala for sweetness and a softer (but not mushy) texture. Avoid very soft apples like Red Delicious, which tend to turn to mush when baked.
Q: My apple filling always seems too runny. What am I doing wrong?
A: Several factors could be at play: not using enough thickener (flour or cornstarch), using very juicy apples without letting them macerate first, or – most commonly – slicing the pie while it’s still too warm. Letting the pie cool completely (at least 2-3 hours) is crucial for the juices to thicken and set into that perfect, gooey consistency. Ensure you bake it long enough for the filling to bubble thickly.

Homemade Apple Pie
- Total Time: 120 minutes
- Yield: 8 servings
- Diet: Vegetarian
Description
A classic homemade apple pie with a flaky, buttery crust and a tender, spiced apple filling.
Ingredients
- All-Purpose Flour: 2 ½ cups
- Granulated Sugar: 1 tsp
- Salt: 1 tsp
- Unsalted Butter: 1 cup (2 sticks), very cold and cubed
- Ice Water: ½ cup
- Apple Cider Vinegar: 1 tsp (optional)
- Apples: 6-7 medium apples (about 3 lbs), a mix of Honeycrisp and Granny Smith
- Lemon Juice: 1 tbsp
- Granulated Sugar: ½ cup (adjust to taste)
- Brown Sugar: ¼ cup, packed
- All-Purpose Flour: 2 tbsp
- Ground Cinnamon: 1 ½ tsp
- Ground Nutmeg: ¼ tsp
- Pinch of Ground Cloves: optional
- Salt: ¼ tsp
- Unsalted Butter: 2 tbsp, cut into small pieces
- Egg Wash: 1 large egg whisked with 1 tbsp milk or water
- Coarse Sugar (like Turbinado): for sprinkling
Instructions
- In a large bowl, whisk together the flour, sugar, and salt for the pie crust.
- Add cold, cubed butter and cut into the flour mixture until it resembles coarse meal.
- Combine ice water and apple cider vinegar in a small bowl and gradually add to the flour mixture until the dough holds together.
- Divide the dough in half, flatten into disks, wrap in plastic, and refrigerate for at least 1 hour.
- Peel, core, and slice apples, then toss with lemon juice.
- In a separate bowl, combine granulated sugar, brown sugar, flour, cinnamon, nutmeg, optional cloves, and salt; mix with apples.
- Preheat oven to 400°F (200°C) and roll out the bottom crust into a 12-inch circle.
- Transfer to a pie dish, fill with apple mixture, and dot with small pieces of butter.
- Roll out the top crust, seal and crimp the edges, then cut slits for steam.
- Brush top with egg wash and sprinkle with coarse sugar.
- Bake for 20 minutes, then lower the temperature to 375°F (190°C) and bake for an additional 30-40 minutes.
- Allow the pie to cool completely for 2-3 hours before slicing.
Notes
For best results, let the dough chill and don’t skip venting the top crust to avoid sogginess.
- Prep Time: 60 minutes
- Cook Time: 60 minutes
- Category: Dessert
- Method: Baking
- Cuisine: American
Nutrition
- Serving Size: 1 slice
- Calories: 450
- Sugar: 30g
- Sodium: 200mg
- Fat: 25g
- Saturated Fat: 12g
- Unsaturated Fat: 8g
- Trans Fat: 0g
- Carbohydrates: 70g
- Fiber: 3g
- Protein: 3g
- Cholesterol: 75mg


