

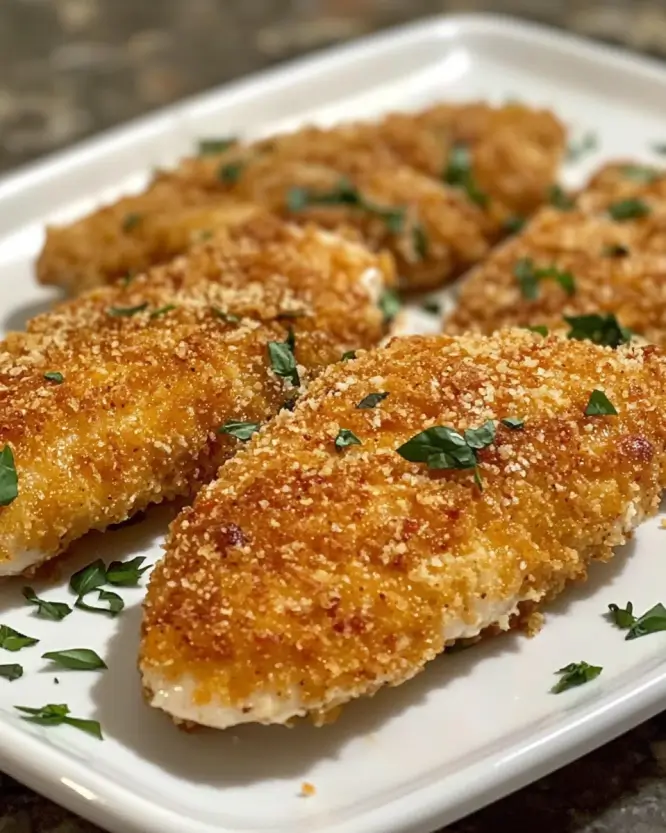
This incredible crispy chicken parmesan recipe is a guaranteed family favorite, perfect for busy weeknights! There’s something magical about that perfect combination of crunchy breaded chicken, savory marinara, and gooey melted cheese.
It’s the kind of hearty meal that brings everyone to the table, even the pickiest eaters. It feels special, but honestly, it’s surprisingly straightforward to whip up. Let’s dive into making the best chicken parm you’ve ever had!
Craving That Perfect Bite?
Are you dreaming of that ultimate comfort food moment? You know the one – where crispy meets cheesy, tangy sauce mingles with tender chicken, and every bite makes you close your eyes and sigh?
That’s what this Crispy Chicken Parmesan delivers. It’s more than just dinner; it’s a hug on a plate, a weeknight recipe hero, and totally kid-friendly.
Ingredients You’ll Need
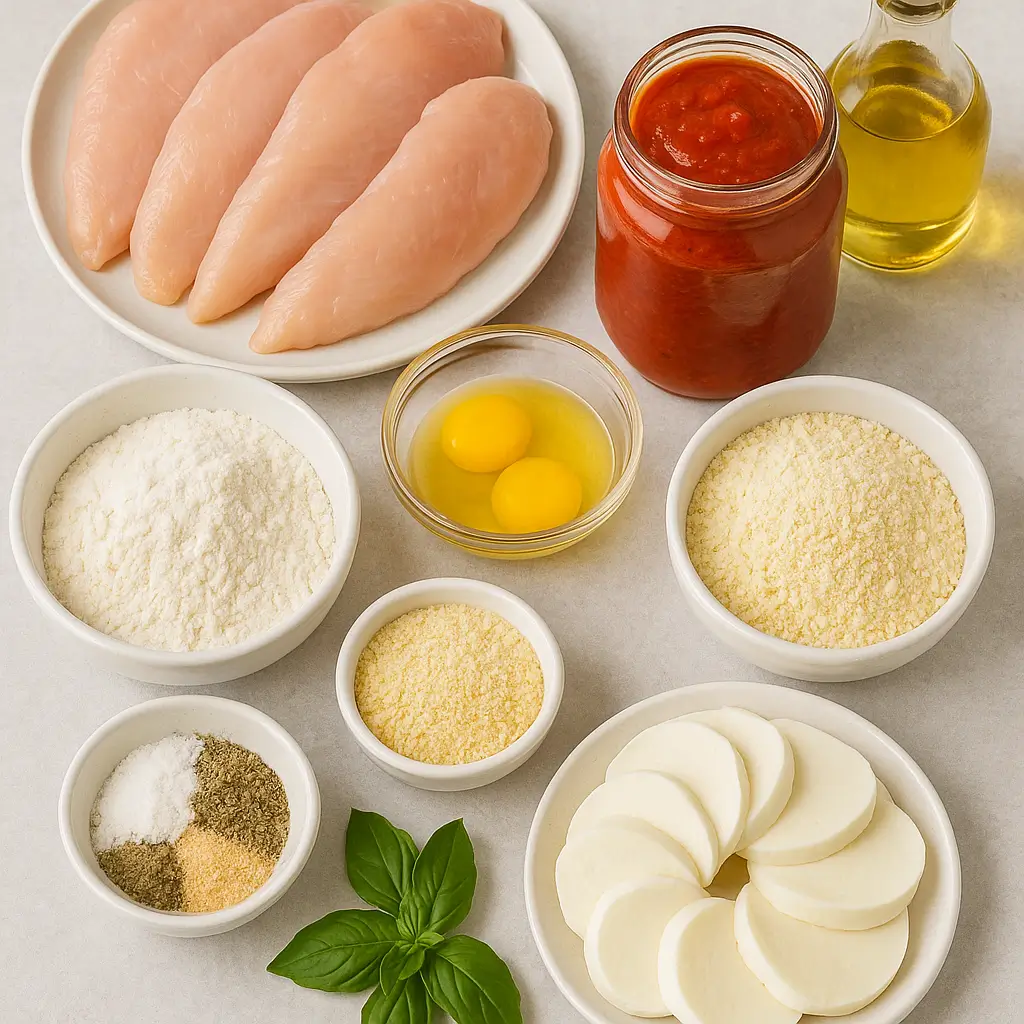
Gather these simple ingredients for your crispy chicken parmesan adventure:
- 4 boneless, skinless chicken breasts (about 6 oz each), pounded to ½-inch thickness
- 1 cup all-purpose flour
- 2 large eggs, beaten
- 1 ½ cups Panko breadcrumbs (key for crispiness!)
- ½ cup grated Parmesan cheese, plus extra for topping
- 1 tsp garlic powder
- 1 tsp dried oregano
- ½ tsp salt
- ¼ tsp black pepper
- Olive oil or vegetable oil, for frying (about ½ cup)
- 1 ½ cups marinara sauce (your favorite store-bought or homemade)
- 8 oz fresh mozzarella cheese, sliced or shredded
- Fresh basil or parsley, for garnish (optional)
Timing: Fitting Comfort Food into Your Busy Schedule
Don’t let the “fried” part scare you off on a busy night! Here’s a realistic breakdown:
- Prep Time: 15-20 minutes (pounding chicken, setting up breading stations)
- Cook Time: 20-25 minutes (frying chicken, baking to melt cheese)
- Total Time: Around 35-45 minutes
This makes it a totally achievable weeknight recipe. You can even prep the breading station ahead!
How to Make Dreamy Crispy Chicken Parmesan
Let’s break down the magic step-by-step. Simple language, real tips!
Pound It Out
Place chicken breasts between two sheets of plastic wrap or parchment paper. Using a meat mallet or heavy rolling pin, gently pound them to an even ½-inch thickness.
Real-Life Tip: Even thickness is crucial for even cooking. Don’t go too thin, or it’ll dry out!
Set Up Your Breading Station
Get three shallow dishes.
- Flour seasoned with a pinch of salt and pepper.
- Beaten eggs.
- Panko breadcrumbs mixed with ½ cup grated Parmesan, garlic powder, oregano, salt, and pepper.
Real-Life Tip: Use one hand for dry ingredients (flour, breadcrumbs) and the other for wet (egg) to avoid “gummy fingers.”
Bread the Chicken
Pat the chicken dry with paper towels (this helps the flour stick). Dredge one piece first in flour, shaking off excess. Dip completely in the egg, letting excess drip off. Finally, press firmly into the Panko mixture, ensuring it’s fully coated. Place on a clean plate or baking sheet. Repeat with remaining chicken.
Get Sizzling (The Crispy Part!)
Heat about ½ inch of oil in a large skillet over medium-high heat. The oil is ready when a breadcrumb sizzles instantly.
Carefully place 2 chicken cutlets in the hot oil (don’t overcrowd!). Fry for 3-4 minutes per side, until golden brown and crispy. Transfer cooked chicken to a wire rack set over a baking sheet. Repeat with remaining chicken, adding more oil if needed.
Real-Life Tip: Using a wire rack instead of paper towels prevents the bottom from getting soggy while you fry the rest. Hot oil is key for crispy chicken parmesan, not greasy!
Sauce, Cheese, Bake!
Preheat your oven to 400°F (200°C). Spoon a thin layer of marinara sauce on the bottom of a baking dish large enough to hold the chicken without overlapping.
Place the crispy chicken cutlets in the dish. Top each cutlet with a generous spoonful of marinara sauce (don’t drench it, or it gets soggy!), followed by mozzarella cheese and a sprinkle of extra Parmesan.
Bake for 10-15 minutes, or until the cheese is melted, bubbly, and lightly golden, and the chicken is heated through.
Garnish and Serve
Sprinkle with fresh basil or parsley if desired. Serve immediately for maximum crispiness!
Nutritional Info: Fueling Your Family
This hearty meal offers great protein for growing bodies thanks to the chicken. The cheese provides calcium, important for strong bones.
- Kid Nutrition: Focus on the lean protein and calcium. Pair it with a side salad or steamed veggies for added vitamins.
- Portion Sizes: A whole cutlet might be much for a toddler. Consider cutting one in half or into strips for smaller appetites. Adjust portion sizes based on age and activity level. Remember, balance is key!
(Note: Specific nutritional values depend on exact ingredients used. Use an online calculator for precise information if needed.)
Healthier Alternatives & Swaps
Want to lighten things up slightly? Easy peasy!
- Sneaky Veggies: Finely grate zucchini or carrots into your marinara sauce. The kids likely won’t notice!
- Low-Sodium: Choose a low-sodium marinara sauce and Parmesan cheese. Control the salt added during breading.
- Baking Option: For a less-oil version, skip the pan-frying. Bread the chicken as directed, spritz generously with cooking spray, and bake at 400°F (200°C) for 20-25 minutes, flipping halfway. Add sauce and cheese for the last 10-15 minutes. It won’t be as ultra-crispy, but still delicious!
- Whole Wheat: Swap Panko for whole wheat breadcrumbs for extra fiber.
Serving Suggestions for the Family Table
Crispy Chicken Parmesan begs for classic pairings:
- Pasta: Spaghetti or fettuccine tossed with extra marinara is the ultimate comfort pairing.
- Lighter Sides: Serve alongside a simple green salad with vinaigrette, roasted broccoli, or steamed green beans.
- Zoodles: For a low-carb option, serve over zucchini noodles.
- Garlic Bread: Because, well, garlic bread! Perfect for soaking up any extra sauce.
- Family Style: Arrange the finished chicken parm on a large platter for a beautiful presentation.
Mistakes to Avoid for Perfect Results
Even simple recipes have pitfalls. Avoid these common ones:
- Soggy Bottoms: Don’t let fried chicken sit on paper towels; use a wire rack. Also, don’t add sauce and cheese until just before baking.
- Uneven Cooking: Ensure chicken is pounded to an even thickness. Don’t overcrowd the frying pan, which lowers oil temperature.
- Over-Seasoning: Remember Parmesan cheese and marinara sauce are already salty. Taste your Panko mixture before adding too much extra salt.
- Over-Saucing: Too much sauce before baking = soggy breading. Add just enough to coat the top, serve extra on the side.
- Leftover Mishaps: Reheating in the microwave yields soggy results. See storing tips below!
Storing Tips: Make-Ahead & Freeze-Friendly Hacks
Life happens! Here’s how to manage leftovers or prep ahead:
- Make-Ahead Breading: You can bread the chicken cutlets a few hours ahead. Store them in a single layer on a baking sheet, covered, in the refrigerator until ready to fry.
- Refrigerator: Store leftover cooked chicken parmesan in an airtight container for up to 3 days.
- Freezing (Best Method): Freeze uncooked, breaded cutlets. Place them on a baking sheet in the freezer until solid, then transfer to a freezer bag or container for up to 3 months. Fry or bake from frozen (add extra cooking time). You can also freeze cooked chicken parm, but the breading may soften upon reheating.
- Reheating for Crispiness: The BEST way is in the oven or air fryer! Preheat to 375°F (190°C). Place chicken parm on a baking sheet or air fryer basket and heat for 10-15 minutes (oven) or 5-8 minutes (air fryer), until hot and re-crisped. Avoid the microwave if you want that crunch back!
The Ultimate Comfort Food Conclusion
This crispy chicken parmesan is more than just a recipe; it’s an invitation to gather around the table for a satisfying, delicious, and comforting meal. It hits all the right notes – crispy, cheesy, savory – and is bound to become a requested favorite.
It proves that impressive kid-friendly meals don’t need to be complicated. Embrace the joy of cooking this classic dish for your loved ones. Happy cooking!
Frequently Asked Questions (FAQs)
Can I double this recipe for a crowd?
Absolutely! Just double all the ingredients. You’ll likely need to fry the chicken in more batches, so allow extra time. Use a larger baking dish or two smaller ones.Can I make this gluten-free?
Yes! Use a gluten-free all-purpose flour blend and gluten-free Panko breadcrumbs (widely available now). Ensure your marinara sauce is also certified gluten-free.What’s the best cheese to use?
Fresh mozzarella melts beautifully and gives that classic “cheese pull.” Low-moisture mozzarella (shredded) also works well. Provolone is another delicious option for a slightly sharper flavor. A mix is great too!I don’t have Panko, can I use regular breadcrumbs?
You can, but Panko breadcrumbs are lighter and airier, creating a much crispier crust. If using regular breadcrumbs, the texture will be denser.Can I prepare the entire dish ahead and just bake later?
It’s best not to assemble it fully (with sauce and cheese) too far in advance, as the breading will get soggy. You can fry the chicken ahead, let it cool, store it, and then add sauce/cheese and bake just before serving (allow a few extra minutes in the oven to heat through).

Crispy Chicken Parmesan
- Total Time: 45 minutes
- Yield: 4 servings 1x
- Diet: None specified
Description
An incredible crispy chicken parmesan recipe that’s perfect for busy weeknights, combining crunchy breaded chicken, savory marinara, and gooey melted cheese.
Ingredients
- 4 boneless, skinless chicken breasts (about 6 oz each), pounded to ½-inch thickness
- 1 cup all-purpose flour
- 2 large eggs, beaten
- 1 ½ cups Panko breadcrumbs
- ½ cup grated Parmesan cheese, plus extra for topping
- 1 tsp garlic powder
- 1 tsp dried oregano
- ½ tsp salt
- ¼ tsp black pepper
- Olive oil or vegetable oil, for frying (about ½ cup)
- 1 ½ cups marinara sauce
- 8 oz fresh mozzarella cheese, sliced or shredded
- Fresh basil or parsley, for garnish (optional)
Instructions
- Place chicken breasts between two sheets of plastic wrap or parchment paper. Pound them to an even ½-inch thickness.
- Set up your breading station with flour seasoned with salt and pepper, beaten eggs, and Panko breadcrumbs mixed with Parmesan, garlic powder, oregano, salt, and pepper.
- Pat the chicken dry, dredge it in flour, dip in egg, and coat thoroughly with the Panko mixture.
- Heat about ½ inch of oil in a large skillet over medium-high heat. Fry chicken cutlets for 3-4 minutes per side until golden brown. Transfer to a wire rack.
- Preheat the oven to 400°F (200°C). Spoon marinara sauce into a baking dish and place the chicken cutlets inside. Top with marinara and mozzarella cheese.
- Bake for 10-15 minutes until the cheese is melted and bubbly. Garnish with fresh basil or parsley and serve immediately.
Notes
For leftover chicken, store in an airtight container for up to 3 days. Reheat in the oven or air fryer for best results.
- Prep Time: 20 minutes
- Cook Time: 25 minutes
- Category: Main Course
- Method: Frying and Baking
- Cuisine: Italian
Nutrition
- Serving Size: 1 serving
- Calories: 350
- Sugar: 5g
- Sodium: 400mg
- Fat: 12g
- Saturated Fat: 4g
- Unsaturated Fat: 6g
- Trans Fat: 0g
- Carbohydrates: 45g
- Fiber: 3g
- Protein: 15g
- Cholesterol: 30mg


