
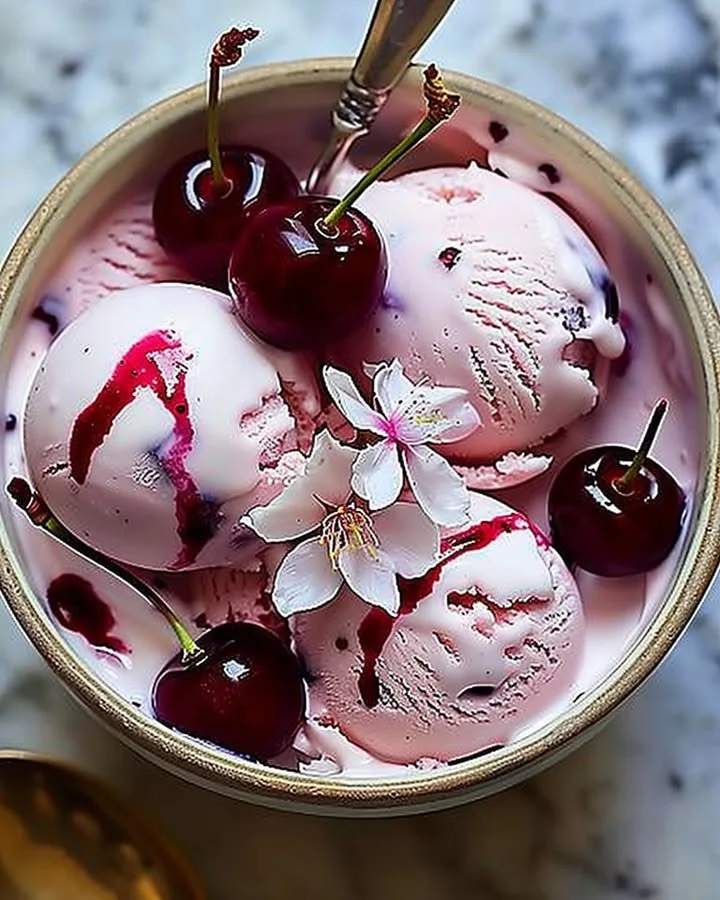
Cherry Blossom Ice Cream
Imagine a serene spring day, where cherry blossoms fill the air with their delicate fragrance, and vibrant pink petals dance in the gentle breeze. Cherry Blossom Ice Cream captures this ephemeral beauty, swirling creamy textures with bright bursts of floral flavors. This recipe invites you to embark on a step-by-step journey through the creation of this exquisite treat, evoking memories of picnics under blooming trees and warm evenings spent savoring life’s simple pleasures. The enchanting aroma of cherries entwines with the rich creaminess, leading to a delightful experience that transcends seasonal boundaries, bringing joy to every scoop.
History / Fun Fact
The origins of cherry blossoms and their connection to springtime festivities date back centuries, particularly in Japan, where the sakura (cherry blossom) holds profound cultural significance. Traditionally, hanami, or cherry blossom viewing, is celebrated with picnics beneath the blossoms, symbolizing renewal and the beauty of fleeting moments. Incorporating cherry blossom flavors into desserts mirrors this celebration, allowing us to enjoy a taste of the season long after the petals have fallen. The whimsical nature of Cherry Blossom Ice Cream not only serves as a delightful dessert but also as a tribute to this beautiful cultural heritage.
Ingredients
To create your very own Cherry Blossom Ice Cream, gather the following magical ingredients:
- 2 cups heavy cream: Rich and luscious, this creamy base will envelop your senses in its velvety embrace.
- 1 cup whole milk: Adds a refreshing touch, lending the perfect balance to the creaminess.
- 1/2 cup sugar: Sweet crystals dissolve into the mix, enhancing the flavor with a hint of bliss.
- 1 tablespoon cherry blossom syrup (or cherry extract): The star ingredients; this syrup infuses the ice cream with its sweet, floral aroma.
- 1/2 cup maraschino cherries, chopped: Adding vibrant pops of color and a burst of sweetness to each spoonful.
- 1 teaspoon vanilla extract: A classic flavor that complements the cherry blossom perfectly, enriching the overall experience.
- Pink food coloring (optional): To enhance the aesthetic allure, a drop of this will transform your ice cream into a visual delight.
Cooking Time & Tips For Cherry Blossom Ice Cream
When preparing Cherry Blossom Ice Cream, you can choose between a quick churn in an ice cream maker or a slow and traditional hand-crank method. Quick preparation allows for a faster payoff, while the slower method can create a uniquely textured ice cream, rich in flavor. For a successful batch, making sure your ice cream maker is pre-chilled and allowing your mixture to cool in the refrigerator for 30 minutes will ensure a smoother churn. Consider using fresh cherries for an extra touch of authenticity or experimenting with your favorite ingredient proportions for a customized delight.
Step-by-Step Directions
Start by grabbing a mixing bowl and combining the heavy cream, whole milk, and sugar. As you whisk together these ingredients, feel the sugar dissolve, transforming the mixture into a silky, glossy base. The aroma is divine, hinting at the world of flavors to come. Next, gently add in the cherry blossom syrup and vanilla extract, stirring to infuse the floral notes. If you’d like a visually appealing hue, add a few drops of pink food coloring, blending until the desired shade is achieved.
Once you’re satisfied with the mixture, pour it into your ice cream maker and churn according to the manufacturer’s instructions. As the mixture begins to thicken, the anticipation builds — soon, you’ll be savoring your very own Cherry Blossom Ice Cream. In the last few minutes of churning, incorporate the chopped maraschino cherries, allowing them to unify into your creamy delight.
When the churning is complete, transfer your luscious ice cream into a container, seal it tightly, and place it in the freezer for at least four hours. This waiting period may feel like eternity, but the result will be worth it as you unveil your creamy masterpiece.
Serving Suggestions & Occasions
Cherry Blossom Ice Cream is a versatile dessert perfect for various occasions. Serve it in elegant bowls adorned with fresh mint leaves for a sophisticated summer gathering, or wedge it between fluffy macarons for an indulgent springtime treat. Pair it with a slice of rich chocolate cake or serve it alongside seasonal fruits for a refreshing picnic dessert. No matter how you present it, Cherry Blossom Ice Cream will surely be the star of the table.
Common Mistakes For Cherry Blossom Ice Cream
One of the most common mistakes in making ice cream at home is neglecting to chill the mixture before churning. Allowing it to cool before placing it in the ice cream maker enhances the texture. Additionally, over-churning can lead to a more icy texture rather than creamy. Always keep an eye on your ice cream during this critical phase. Lastly, be cautious with adding colors—less is more. A few drops can create a stunning effect without overpowering the natural beauty of the flavors.
Healthier Alternatives & Variations
If you’re looking for a healthier spin on Cherry Blossom Ice Cream, consider substituting heavy cream with coconut cream or using almond milk. You can also reduce sugar to accommodate a lighter palate, or opt for natural sweeteners like honey or maple syrup. For a decadent twist, stirring in chocolate chips or crushed cookies can add delightful layers of flavor. Customize it by exploring various fruit purees or even infused herbs alongside the cherry blossom profile.
FAQs
Can I use fresh cherries instead of maraschino cherries?
Absolutely! Fresh cherries will provide a vibrant and authentic cherry flavor, especially if they’re in season.How long does the ice cream last in the freezer?
Stored properly in an airtight container, Cherry Blossom Ice Cream can last up to two weeks in the freezer.Do I need an ice cream maker to make this recipe?
While an ice cream maker makes the process easier, you can freeze the mixture in a container, stirring every 30 minutes for a few hours until it reaches the desired consistency.Can I make this dairy-free?
Yes, by using alternatives like coconut cream and almond milk, you can create a delicious dairy-free version.What can I substitute for cherry blossom syrup?
Cherry extract or even a homemade cherry syrup can create similar delightful notes if cherry blossom syrup isn’t available.Can I serve this ice cream at a party?
Cherry Blossom Ice Cream is perfect for gatherings, serving as a light, refreshing dessert that captivates guests.
Conclusion
Now that you’ve discovered the enchanting experience of Cherry Blossom Ice Cream, it’s time to indulge your senses and create your own batch. With each scoop, you’ll be transported to a dreamy spring landscape, celebrating flavors that bloom joy and nostalgia. Gather your ingredients, follow the step-by-step instructions, and let the magic unfold in your kitchen. There’s no better moment than now to treat yourself and your loved ones to this unforgettable ice cream delight.
Print
Cherry Blossom Ice Cream
- Total Time: 270 minutes
- Yield: 4 servings 1x
- Diet: Vegetarian
Description
Cherry Blossom Ice Cream captures the delicate essence of spring with creamy textures and floral flavors, inviting you to enjoy a delightful treat.
Ingredients
- 2 cups heavy cream
- 1 cup whole milk
- 1/2 cup sugar
- 1 tablespoon cherry blossom syrup (or cherry extract)
- 1/2 cup maraschino cherries, chopped
- 1 teaspoon vanilla extract
- Pink food coloring (optional)
Instructions
- Combine the heavy cream, whole milk, and sugar in a mixing bowl, whisking until the sugar is dissolved.
- Add the cherry blossom syrup and vanilla extract, stirring to blend.
- Incorporate a few drops of pink food coloring if desired, mixing until evenly colored.
- Pour the mixture into your ice cream maker and churn according to the manufacturer’s instructions.
- During the last few minutes of churning, add the chopped maraschino cherries.
- Transfer the ice cream to a container, sealing it tightly, and freeze for at least 240 minutes.
Notes
Make sure the ice cream mixture is chilled before churning for the best texture. Avoid over-churning to maintain creaminess.
- Prep Time: 30 minutes
- Cook Time: 0 minutes
- Category: Dessert
- Method: Churning
- Cuisine: Japanese
Nutrition
- Serving Size: 1 serving
- Calories: 320
- Sugar: 28g
- Sodium: 100mg
- Fat: 24g
- Saturated Fat: 14g
- Unsaturated Fat: 6g
- Trans Fat: 0g
- Carbohydrates: 34g
- Fiber: 0g
- Protein: 4g
- Cholesterol: 70mg


