
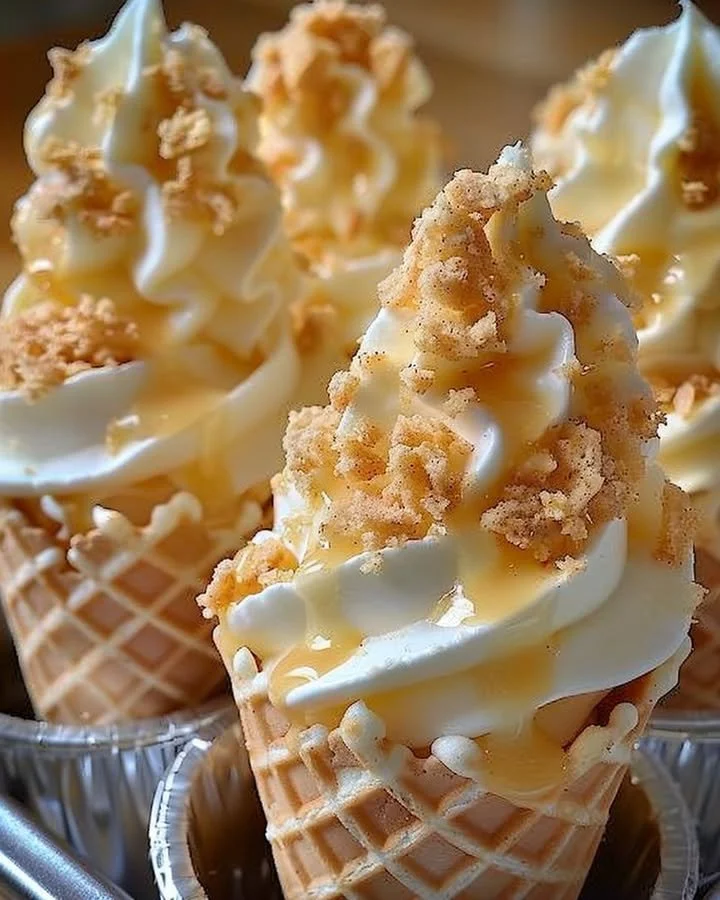
Banana Pudding Cheesecake Cones
Banana Pudding Cheesecake Cones are a delightful fusion of two decadent desserts wrapped in a fun and convenient treat. Picture this: a crisp waffle cone filled with layers of creamy, dreamy cheesecake that boasts the comforting flavors of banana pudding. Each bite combines the velvety smoothness of cream cheese, the sweetness of bananas, and the delightful crunch of vanilla wafers, all coming together in a perfect handheld serving. Whether you’re hosting a party or simply satisfying a sweet tooth, these delightful cones are a fantastic dessert option well worth making!
Why You’ll Love This Recipe
This Banana Pudding Cheesecake Cones recipe brings numerous benefits, making it a go-to choice for dessert lovers. First and foremost, the prep is simple, rendering it accessible even for novice bakers. The layers allow you to customize each cone, catering to individual tastes. It’s a family-friendly treat that appeals to both kids and adults and requires minimal ingredients. Plus, with a quick prep time, you can whip these cones up in no time, ensuring a delicious dessert is always within reach.
Ingredients for Banana Pudding Cheesecake Cones
To create these delightful Banana Pudding Cheesecake Cones, gather your ingredients:
- 6 waffle cones—golden and crispy, perfect for holding the creamy filling.
- 1 (8 oz) block cream cheese, softened—provides a rich and indulgent backdrop for the cheesecake flavor.
- 1/2 cup sweetened condensed milk—adds smooth sweetness to balance the cream cheese.
- 1 (3.4 oz) box instant banana cream pudding mix—captures that authentic banana flavor in an instant!
- 1 1⁄2 cups cold milk—helps to create the perfect creamy mixture.
- 1 tsp vanilla extract—enhances the sweetness and depth of flavor.
- 1 cup whipped topping (like Cool Whip)—to achieve a light and airy texture.
- 1/2 cup crushed vanilla wafers—adds a delightful crunch and flavor contrast.
- 1 large banana, sliced—fresh banana slices to complement that pudding flavor.
- Extra whipped topping & wafers for garnish—because presentation is key!
These ingredients combine effortlessly to create an irresistible dessert experience.
Step-by-Step Directions
Begin by placing your softened cream cheese in a large mixing bowl. Using an electric mixer, beat the cream cheese until it’s smooth and creamy, ensuring there are no lumps.
Gradually add the sweetened condensed milk, instant banana cream pudding mix, cold milk, and vanilla extract to the bowl. Continue mixing until everything is thick and fully combined, giving you a luscious cheesecake base.
Next, gently fold in the whipped topping. This step is key for achieving a light and fluffy consistency, making your cheesecake filling just perfect.
Take your waffle cones and layer the bottom with crushed vanilla wafers. This will create a delicious crunch at the base that pairs beautifully with the creamy filling.
Spoon in a generous amount of the cheesecake filling, followed by a slice or two of fresh banana on top. Repeat these layers until each cone is packed full of deliciousness.
Finally, finish off with a dollop of extra whipped topping, more crushed vanilla wafers, and a slice or wafer for garnish.
For the best texture, chill the cones upright in the refrigerator for about 30 minutes before serving.
Tips & Tricks
Creating the perfect Banana Pudding Cheesecake Cones can be even easier with these tips!
- Make sure your cream cheese is softened completely; this will prevent lumps in your filling.
- If you’d like to introduce a bit more flavor, consider adding a sprinkle of cinnamon to the banana slices or mixing some crushed nuts into your wafers.
- To save time, you can prepare the cheesecake filling ahead of time and refrigerate it, then assemble the cones when ready to serve.
- Customize each cone with different layers; try layering in some mini chocolate chips or a drizzle of caramel for an extra twist.
- Don’t skip on the chilling step! This ensures that the cones hold their shape and are easier to enjoy.
Serving Suggestions & Pairings
When it comes to serving Banana Pudding Cheesecake Cones, presentation is delightful yet simple. Consider arranging the cones in a mason jar or a tall glass for a fun and quirky display. They pair wonderfully with a scoop of vanilla ice cream or a hot cup of coffee for a delightful after-dinner treat. Additionally, serve with fresh fruit on the side, such as strawberries or blueberries, for a colorful touch that balances the sweetness of the cones. Kids will love creating their custom desserts by choosing their toppings, making it a perfect interactive dessert for gatherings.
Nutritional Information
While treating yourself to Banana Pudding Cheesecake Cones, it’s good to keep in mind the nutritional breakdown. Each cone is a delightful indulgence, bringing flavor and fun with moderate calories due to the cream cheese, sweetened condensed milk, and whipped topping. A typical serving might have around 300-350 calories. Enjoy mindfully, and don’t hesitate to treat yourself—after all, desserts are all about enjoyment!
Storing Tips & Variations for Banana Pudding Cheesecake Cones
Should you have any leftover cones, storing them correctly ensures they maintain their delicious freshness. Place them in an airtight container in the refrigerator for up to 2 days. As they contain fresh fruit, it’s best to consume them relatively quickly to enjoy their optimal texture. If you’re looking for variations, consider swapping out the banana for other fruits like strawberries or peaches, or try a chocolate pudding mix instead. You can even make these vegan by using dairy-free cream cheese and whipped topping.
Conclusion for Banana Pudding Cheesecake Cones
It’s time to grab your ingredients and have some fun in the kitchen—making Banana Pudding Cheesecake Cones is not only easy but extremely satisfying! With their creamy texture, delicious flavors, and fun presentation, these cones are bound to be a favorite among family and friends. Whether for a casual weeknight dessert or a festive gathering, they’re sure to impress. So what are you waiting for? Dive into making these delectable cones today!
FAQs
Can I make the cheesecake filling ahead of time?
Yes! The filling can be made ahead of time and stored in the refrigerator for later use. Just be sure to assemble the cones right before serving for the best texture.What can I use in place of the whipped topping?
For a homemade alternative, you can whip up heavy cream with a bit of sugar to make your own whipped cream or use a dairy-free whipped cream if you prefer a vegan version.Do these cones need to be served immediately?
While they can be served right away, chilling the cones for about 30 minutes before serving improves the texture and taste, making them more enjoyable.Can I freeze these cones?
It’s best not to freeze the filled cones, as the texture of the bananas and whipped topping may change. The filling can be frozen in an airtight container and used later when you’re ready to assemble.How long can I store leftover filled cones?
Leftover filled cones can be stored in the refrigerator for about 2 days, but they are best enjoyed fresh for optimal taste and texture.

Banana Pudding Cheesecake Cones
- Total Time: 45 minutes
- Yield: 6 servings 1x
- Diet: Vegetarian
Description
A delightful fusion of banana pudding and cheesecake wrapped in a crispy waffle cone.
Ingredients
- 6 waffle cones
- 1 (8 oz) block cream cheese, softened
- 1/2 cup sweetened condensed milk
- 1 (3.4 oz) box instant banana cream pudding mix
- 1 1/2 cups cold milk
- 1 tsp vanilla extract
- 1 cup whipped topping (like Cool Whip)
- 1/2 cup crushed vanilla wafers
- 1 large banana, sliced
- Extra whipped topping & wafers for garnish
Instructions
- Begin by placing your softened cream cheese in a large mixing bowl. Using an electric mixer, beat the cream cheese until it’s smooth and creamy, ensuring there are no lumps.
- Gradually add the sweetened condensed milk, instant banana cream pudding mix, cold milk, and vanilla extract to the bowl. Continue mixing until everything is thick and fully combined, giving you a luscious cheesecake base.
- Next, gently fold in the whipped topping. This step is key for achieving a light and fluffy consistency, making your cheesecake filling just perfect.
- Take your waffle cones and layer the bottom with crushed vanilla wafers. This will create a delicious crunch at the base that pairs beautifully with the creamy filling.
- Spoon in a generous amount of the cheesecake filling, followed by a slice or two of fresh banana on top. Repeat these layers until each cone is packed full of deliciousness.
- Finally, finish off with a dollop of extra whipped topping, more crushed vanilla wafers, and a slice or wafer for garnish.
- For the best texture, chill the cones upright in the refrigerator for about 30 minutes before serving.
Notes
Make sure your cream cheese is fully softened to avoid lumps. Customize each cone with different toppings and flavors.
- Prep Time: 15 minutes
- Cook Time: 0 minutes
- Category: Dessert
- Method: No Bake
- Cuisine: American
Nutrition
- Serving Size: 1 cone
- Calories: 325
- Sugar: 15g
- Sodium: 150mg
- Fat: 16g
- Saturated Fat: 8g
- Unsaturated Fat: 7g
- Trans Fat: 0g
- Carbohydrates: 40g
- Fiber: 1g
- Protein: 5g
- Cholesterol: 30mg


