
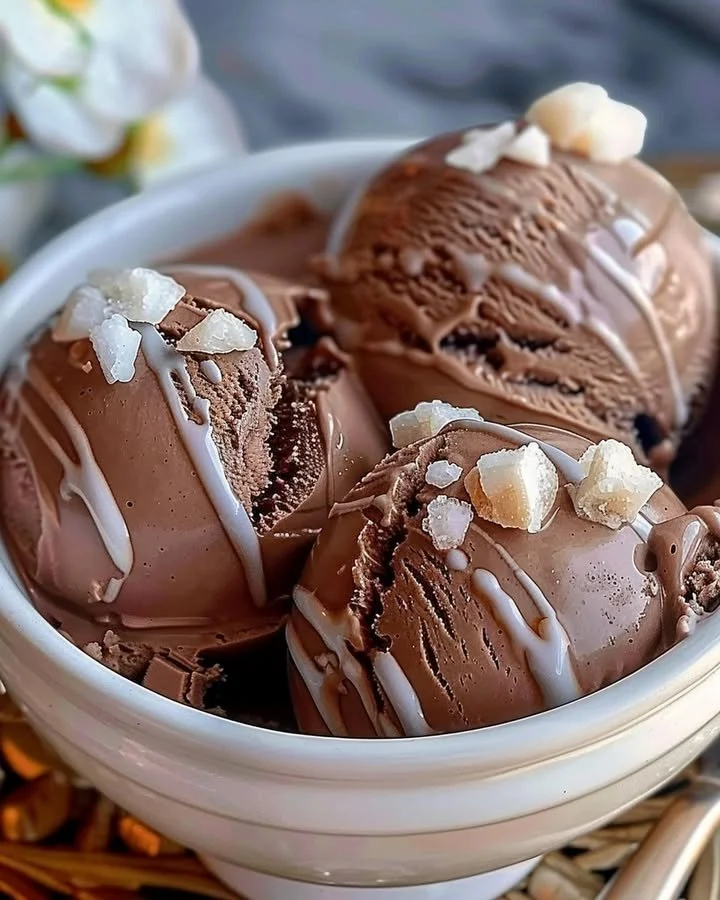
Homemade Chocolate Ice Cream
The joy of a hot summer day often calls for a sweet remedy, and what could be more delightful than the rich and creamy allure of homemade chocolate ice cream? This recipe will take you on a step-by-step journey of creating a frozen treat that captivates your senses and fills your heart with nostalgia. Imagine the aroma of melted chocolate mixing with the soft, creamy notes of dairy, an inviting scent that curls around you as you bring this dessert to life. Each spoonful promises a velvety texture that dances across your palate, leaving behind a lingering sweetness that melts into pure happiness.
History / Fun Fact
The origins of ice cream trace back several centuries, but our beloved chocolate ice cream took center stage in the late 17th century. Although different cultures contributed to its evolution, the introduction of chocolate into ice cream recipes revolutionized how we enjoy this beloved treat. In the United States, chocolate ice cream became widely popular in the early 20th century, with restaurants and diners featuring it as an essential offering. Today, it serves as an indulgent dessert that unites friends and families, offering comfort on a hot day and sparking a shared love for this decadent delight.
Ingredients
To craft this exquisite homemade chocolate ice cream, gather the following essential ingredients:
- 2 cups heavy cream: This rich, silky cream serves as the base, offering a luxurious texture.
- 1 cup whole milk: Lending a mellow creaminess that balances the richness of heavy cream.
- 3/4 cup granulated sugar: Sweetening the mix to perfection, creating a delightful contrast to the bitterness of cocoa.
- 1/2 cup unsweetened cocoa powder: This is where the chocolate magic happens, providing a deep, luscious chocolate flavor.
- 1 teaspoon vanilla extract: Adding warmth and depth, elevating the overall flavor profile.
- A pinch of salt: A little salt enhances the sweetness, creating a harmonious blend of flavors.
Cooking Time & Tips For Homemade Chocolate Ice Cream
Creating homemade chocolate ice cream can either be a quick endeavor or a slow, deliberate process. If you’re in a hurry, you can churn and freeze your ice cream quickly, but allowing it to freeze slowly can yield a creamier texture and deeper flavor.
For optimal results, always chill your mixing bowl and ice cream maker bowl prior to preparing the mix. This helps maintain the cold temperature throughout the churning process, ensuring a smooth finish. It’s also essential to whisk until the sugar fully dissolves to avoid graininess in the texture.
Step-by-Step Directions
Begin your delightful journey by grabbing a mixing bowl, feeling the coolness of the ceramic beneath your fingers. Pour in the 2 cups of heavy cream, its thick consistency enticing you with its promise of creaminess. Next, add in 1 cup of whole milk, creating a rich mélange. Sprinkle in the 3/4 cup of granulated sugar, envisioning the sweetness it will bring.
Carefully sift in the 1/2 cup of unsweetened cocoa powder, watching as it swirls into the mix, transforming everything into a chocolate lover’s dream. Add the 1 teaspoon of vanilla extract and a pinch of salt; feel the magic building.
Now, grab your whisk and get to work! With each stroke, integrate the ingredients until they blend seamlessly, the sugar dissolving and the aroma wafting through the room like a sweet invitation.
Once your mixture is ready, pour this luscious chocolate concoction into your ice cream maker. Follow the manufacturer’s instructions, churning until it reaches a soft-serve consistency that you can already taste in your mind. It’s difficult to resist stealing a spoonful at this stage!
When it’s ready, transfer your chocolate delight into an airtight container, witnessing the transformation from liquid to frozen wonder. Finally, pop it in the freezer for at least 4 hours, or until it’s firm enough to scoop. When you’re ready to indulge, scoop out a generous portion and take a moment to relish that dreamy, creamy experience.
Serving Suggestions & Occasions
Homemade chocolate ice cream is a versatile treat, ideal for various occasions. Serve it in a chilled bowl, embellishing with chocolate shavings or a drizzle of caramel sauce for an extra touch. Pair it with freshly baked brownies for an indulgent dessert experience or use it as a filling in chocolate sandwiches for a fun treat. It’s also a lovely companion to fruit salads, adding a creamy richness that balances the freshness of the fruit. Perfect for birthday parties, casual summer get-togethers, or even as a midnight snack, this recipe is bound to be a hit.
Common Mistakes For Homemade Chocolate Ice Cream
One common pitfall when making chocolate ice cream is not allowing the mixture to chill adequately before churning. This step is crucial as it affects the texture significantly. Another mistake is over-churning, which can lead to icy textures rather than the smooth, creamy consistency desired. Be cautious with the cocoa powder; not using enough or opting for sweetened cocoa can alter the final flavor. Lastly, not letting the ice cream freeze long enough can result in slushy textures instead of a firm scoop.
Healthier Alternatives & Variations
If you’re looking for a healthier spin on this classic recipe, consider substituting part of the heavy cream and whole milk with low-fat milk or almond milk. You can also use agave nectar or honey instead of granulated sugar for a natural sweetness. For a fun variation, explore adding in mix-ins like crushed nuts, chocolate chips, or pieces of your favorite cookies to elevate the flavor profile. You can even create a mint chocolate version by incorporating a few drops of mint extract into the base!
FAQs
Can I use a different type of milk?
Absolutely! You can substitute whole milk with almond milk, oat milk, or any other milk alternative for a different flavor and texture.How can I make it dairy-free?
To make this recipe dairy-free, use coconut cream or a heavy cream substitute and non-dairy milk.How long will the ice cream last in the freezer?
Homemade ice cream can last for about 2-3 weeks in the freezer when stored in an airtight container.Can I make this without an ice cream maker?
Yes! You can use a shallow dish to freeze the mixture, stirring every 30 minutes until it reaches the desired consistency.What is the ideal serving temperature for ice cream?
Allow your homemade chocolate ice cream to sit out at room temperature for about 5-10 minutes before serving to achieve the perfect scooping consistency.Can I add ingredients while churning?
Definitely! You can add chocolate chips, nuts, or fruits during the last 5 minutes of churning for added texture and flavor.
Conclusion
Now that you’ve journeyed through the sensory adventure of making homemade chocolate ice cream, why not dive in and create this delicious treat? The rich, creamy flavor, bursting with deep chocolate goodness, awaits you! Treat yourself to this self-made indulgence that connects you to memories, comfort, and the sheer joy of ice cream. Grab your ingredients, and let’s make homemade chocolate ice cream an unforgettable experience!
Print
Homemade Chocolate Ice Cream
- Total Time: 240 minutes
- Yield: 4 servings 1x
- Diet: Vegetarian
Description
Enjoy the rich and creamy allure of homemade chocolate ice cream, a perfect treat for hot summer days.
Ingredients
- 2 cups heavy cream
- 1 cup whole milk
- 3/4 cup granulated sugar
- 1/2 cup unsweetened cocoa powder
- 1 teaspoon vanilla extract
- A pinch of salt
Instructions
- Grab a mixing bowl and pour in the heavy cream.
- Add the whole milk to create a rich mixture.
- Sprinkle in the granulated sugar, envisioning the sweetness.
- Carefully sift in the cocoa powder, transforming the mix.
- Add the vanilla extract and a pinch of salt.
- Whisk the ingredients until well combined and the sugar dissolves.
- Pour the mixture into your ice cream maker and churn until soft-serve consistency.
- Transfer to an airtight container and freeze for at least 4 hours.
- Scoop out a generous portion and enjoy!
Notes
For creamier texture, chill your mixing bowl and ice cream maker bowl before use. Adjust the sweetness to taste.
- Prep Time: 10 minutes
- Cook Time: 0 minutes
- Category: Dessert
- Method: Churning
- Cuisine: American
Nutrition
- Serving Size: 1 serving
- Calories: 350
- Sugar: 34g
- Sodium: 75mg
- Fat: 26g
- Saturated Fat: 16g
- Unsaturated Fat: 6g
- Trans Fat: 0g
- Carbohydrates: 40g
- Fiber: 2g
- Protein: 5g
- Cholesterol: 90mg


