
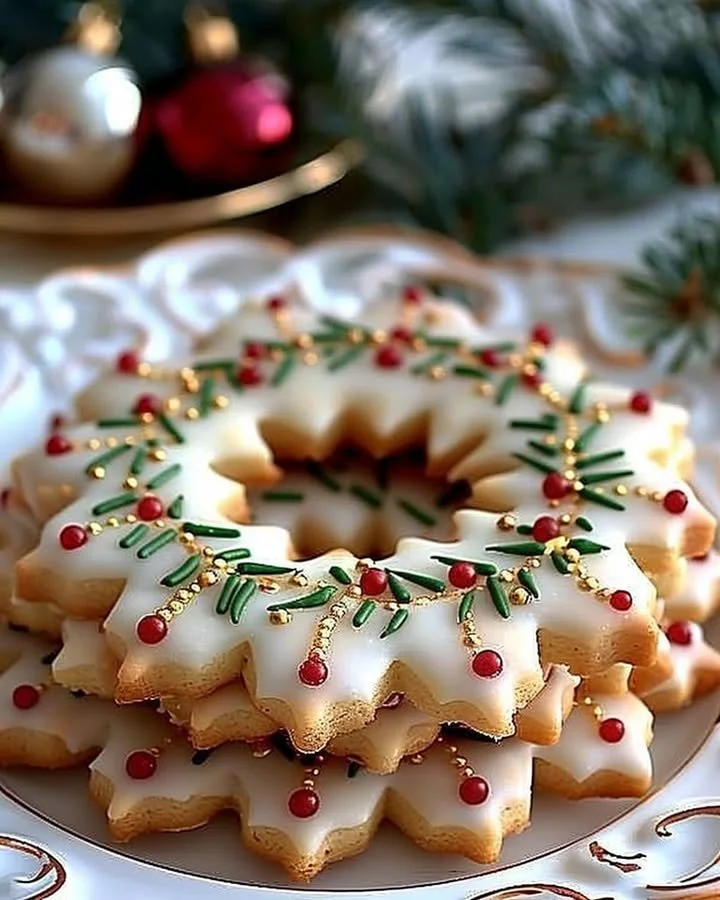
Golden Holly Crown Cookies
The aroma of freshly baked cookies wafts through the air, enveloping your kitchen in a warm embrace, as you embark on the delightful journey of making Golden Holly Crown Cookies. This recipe, presented in a fun step-by-step format, is the perfect blend of festive spirit and culinary artistry. Imagine the delicate crunch of these festive crown-shaped treats adorned with vibrant green icing and sparkling gold dust, sure to evoke feelings of joy and celebration. Prepare yourself to enter a world of flavors, textures, and creativity, bringing forth cookies that not only look stunning but taste heavenly.
History / Fun Fact
The concept of holiday cookies has deep roots in various cultures, with the tradition of cookie making during festive seasons dating back centuries. The Golden Holly Crown Cookies draw inspiration from the decorative crowns of holly often used during winter holidays. Traditionally, the holly plant symbolizes protection and fertility, making it an ideal representation of the joyous spirit of the season. In Victorian England, it became customary to use cookies as novelties during Christmas gatherings, elevating them to cherished family traditions. This recipe captures that essence, allowing you to create your own memories while embracing a delightful slice of history.
Ingredients
To create these delightful Golden Holly Crown Cookies, gather the following heavenly ingredients:
- 2 1/2 cups all-purpose flour: Creamy and soft, this foundation gives the cookies a delightful tenderness.
- 1 tsp baking powder: This essential ingredient provides the perfect lift for your crown-shaped delights.
- 1/4 tsp salt: A pinch of salt to enhance and balance the sweet flavors beautifully.
- 1 cup unsalted butter, softened: Rich, creamy, and aromatic, this butter acts as the heart of the cookie dough.
- 1 cup powdered sugar: This sweet addition adds an indulgent sweetness, making every bite melt in your mouth.
- 1 large egg: The binding agent that holds the dough together while adding richness to each cookie.
- 1 tsp vanilla extract: The warm, comforting aroma of vanilla adds depth to your cookies.
- 1/2 tsp almond extract (optional): For those who enjoy a touch of nuttiness, this optional ingredient elevates the flavor profile.
- Green colored sugar or green icing: To mimic the look of holly leaves, adding visual appeal to your cookies.
- Red candy or M&M’s (for the holly berries): These bright accents will tantalize the eye and add a burst of color.
- Gold sprinkles or edible gold dust: What better way to finish off your festive creations than a sprinkle of gold?
Cooking Time & Tips For Golden Holly Crown Cookies
Creating your Golden Holly Crown Cookies can be rushed or savored; it’s your choice! Quick preparations yield cookies in less than an hour but take care not to rush the cooling and decorating processes, as they are essential for capturing the right textures and flavors. Taking your time, however, allows for the enjoyment of every step—from mixing the ingredients to adorning your cookies with beautiful decorations, fully embracing the joy of baking.
Here are some practical tips for success:
- Ensure your butter is at room temperature for easy creaming.
- Don’t skip the chilling process of the dough if time allows; this helps maintain shape during baking.
- Experiment with different shapes or decorations; the key is to have fun and let your creativity shine!
Step-by-Step Directions
Begin by preheating your oven to a cozy 350°F (175°C). As the oven warms up, line a baking sheet with parchment paper—this little touch will make clean-up a breeze.
In a large mixing bowl, whisk together the all-purpose flour, baking powder, and salt. The blend of these dry ingredients creates a light and airy texture to your cookies.
In another bowl, cream the softened butter and powdered sugar together using a hand mixer or stand mixer until the mixture is smooth and fluffy. The sweet aroma will fill your kitchen as you blend the ingredients. Introduce the egg, vanilla extract, and almond extract (if using), mixing until well combined and rich.
Gradually add the dry ingredients to the wet mixture, stirring gently until everything is combined into a soft dough—it should come together beautifully without being sticky.
Sprinkle your work surface with a little flour and roll out the dough, aiming for about 1/4 inch thickness. Using a circular or crown-shaped cookie cutter, cut out your cookies with careful precision, imagining how they will look when decorated.
Place the cut cookies on your prepared baking sheet. Bake in your preheated oven for about 10-12 minutes, or until the edges are lightly golden. The warm, enticing scent will be blissful!
Allow the cookies to cool completely on a wire rack—patience is key! This step ensures the frosting or icing doesn’t melt into the cookies.
Once cooled, get creative as you decorate! Dip cookies into vibrant green sugar or pipe green icing in whimsical holly leaf shapes; add a pop of color with red candy or M&M’s for the holly berries. Lastly, sprinkle with gold for that festive flair!
Serving Suggestions & Occasions
Golden Holly Crown Cookies are perfect for a variety of occasions, from holiday gatherings to cozy family evenings. They make for delightful gifts when packaged beautifully or set out on a festive platter at parties. Their charming appearance and festive hues bring smiles to faces and warmth to hearts, making them an ideal treat to share with loved ones. Imagine these cookies gracing the table at a holiday brunch or accompanying a warm cup of tea during chilly winter evenings while stories are shared and memories are made.
Common Mistakes For Golden Holly Crown Cookies
While baking is a delightful adventure, it’s easy to encounter a few hiccups. Here are common mistakes to avoid:
- Overmixing the dough can lead to tough cookies, so mix just until combined.
- Ensure your oven is correctly calibrated; an oven that runs hot can quickly overbake your cookies.
- Neglecting the cooling process can lead to melting decorations; patience here is a must for a beautiful finish.
Healthier Alternatives & Variations
If you’re looking to lighten up these delectable treats, consider using a healthy butter alternative, such as coconut oil, or opting for whole wheat flour for added nutrition. For a different flavor profile, try replacing vanilla extract with orange or peppermint extract. You can also create a gluten-free version by substituting the all-purpose flour with a certified gluten-free blend.
FAQs
Can I make these cookies in advance?
Yes! The cookie dough can be prepared ahead of time and refrigerated for up to one week or frozen for up to three months.What is the best way to store Golden Holly Crown Cookies?
Store in an airtight container at room temperature. They can last for about a week, although they are best enjoyed fresh!Can I freeze leftover cookies?
Definitely! Lay the decorated cookies on a baking sheet and freeze until solid, then transfer to an airtight container.What can I do with leftover icing or decorations?
Get creative! Use them to garnish other baked goods or as toppings for cakes or cupcakes.Can I use a different shape for the cookies?
Absolutely! Use whatever cookie cutter shape you fancy—a star, tree, or even a simple circle to keep it classic.Can kids help with this recipe?
Yes! This recipe is perfect for children to help with, especially during the decorating phase. It’s a wonderful family activity!
Conclusion
Imagine the delight as you take your first bite of a Golden Holly Crown Cookie—a tender, buttery cookie that crumbles beautifully as it meets your mouth, complemented by the warmth of spices and the sweetness of adornments. They are not merely cookies; they are joyful creations brimming with festive spirit. Experience the joy of baking these crown-shaped delights today and let the festivities begin. Gather your loved ones, don your aprons, and create your own memories with this charming recipe!
Print
Golden Holly Crown Cookies
- Total Time: 27 minutes
- Yield: 24 servings 1x
- Diet: Vegetarian
Description
Delightful crown-shaped cookies adorned with vibrant green icing and sparkling gold dust, perfect for festive celebrations.
Ingredients
- 2 1/2 cups all-purpose flour
- 1 tsp baking powder
- 1/4 tsp salt
- 1 cup unsalted butter, softened
- 1 cup powdered sugar
- 1 large egg
- 1 tsp vanilla extract
- 1/2 tsp almond extract (optional)
- Green colored sugar or green icing
- Red candy or M&M’s (for the holly berries)
- Gold sprinkles or edible gold dust
Instructions
- Preheat your oven to a cozy 350°F (175°C) and line a baking sheet with parchment paper.
- Whisk together the all-purpose flour, baking powder, and salt in a large mixing bowl.
- Cream the softened butter and powdered sugar together until smooth and fluffy.
- Add the egg, vanilla extract, and almond extract (if using), mixing until well combined.
- Gradually add the dry ingredients to the wet mixture, stirring gently until combined into a soft dough.
- Roll out the dough on a floured surface to about 1/4 inch thickness and cut into preferred shapes.
- Place the cut cookies on the baking sheet and bake for about 10-12 minutes, until edges are lightly golden.
- Cool cookies on a wire rack completely.
- Decorate with green icing, red candy, and gold dust as desired.
Notes
Ensure butter is at room temperature for easy creaming. Chilling the dough helps maintain shape during baking.
- Prep Time: 15 minutes
- Cook Time: 12 minutes
- Category: Dessert
- Method: Baking
- Cuisine: American
Nutrition
- Serving Size: 1 cookie
- Calories: 150
- Sugar: 8g
- Sodium: 100mg
- Fat: 8g
- Saturated Fat: 4g
- Unsaturated Fat: 3g
- Trans Fat: 0g
- Carbohydrates: 19g
- Fiber: 0g
- Protein: 1g
- Cholesterol: 30mg


