
Looking for the ultimate easy chocolate fudge recipe that guarantees decadent, melt-in-your-mouth results every single time? Craving that rich, intensely chocolatey goodness but intimidated by candy thermometers and complicated steps? You’ve landed in the sweetest corner of the internet!
That Sweet Tooth Question: Can Fudge Really Be This Easy?
Oh, absolutely! Forget everything you thought you knew about fussy candy-making. This foolproof chocolate fudge recipe is your shortcut to pure bliss. We’re talking minimal ingredients, maximum flavour, and a process so simple, it feels like magic.
Whether you need a last-minute holiday treat, a gorgeous homemade gift, or just a way to answer that urgent sweet tooth calling, this recipe is your new best friend.
Prepare for velvety smooth, deeply satisfying fudge that will make you wonder why you ever bought the pre-made stuff. This is the easy dessert dreams are made of!
Ingredients: The Dream Team of Decadence
Simplicity is key here, but each ingredient plays a starring role in creating that signature fudge texture and flavour.
| Ingredient | Quantity | Sensory Hook | Emotional Hook |
|---|---|---|---|
| Semi-Sweet Chocolate Chips | 2 cups (approx 12oz) | Deep, dark morsels promising intense cocoa richness. | The foundational hug of pure chocolate comfort. |
| Sweetened Condensed Milk | 1 can (14oz) | Thick, sticky, liquid gold – the secret to instant creaminess and sweetness. | That nostalgic sweetness, the key to effortless indulgence. |
| Pure Vanilla Extract | 1 teaspoon | An aromatic whisper that elevates and rounds out the chocolate flavour. | The final touch of warmth and familiarity, like a baker’s secret ingredient. |
You’ll also need parchment paper and an 8×8 inch baking pan. That’s it!
Timing: Instant Gratification vs. Eager Anticipation
This easy chocolate fudge recipe falls firmly into the “fast and indulgent” category.
- Active Prep Time: Under 10 minutes! Seriously. Melting and mixing is lightning fast.
- Chilling Time: Approximately 2 hours. This is where the magic solidifies. It’s passive time, perfect for dreaming about that first bite.
Forget recipes that demand hours of simmering and careful temperature watching. This is about getting you to that rich, fudgy payoff ASAP.
Step 1: Prepare Your Fudge’s Cozy Bed
First things first: Line your 8×8 inch baking pan with parchment paper, leaving a slight overhang on two opposite sides.
This genius little trick creates “handles” that will make lifting the chilled fudge out a breeze. No sticking, no struggling – just clean, easy removal. Set it aside, ready to catch the molten chocolate goodness.
Step 2: The Magical Melt – Low and Slow is the Way to Go
Combine the 2 cups of semi-sweet chocolate chips and the entire can of glorious sweetened condensed milk in a medium saucepan. Place it over low heat. I repeat: LOW heat! This is crucial.
You want to gently coax the chocolate into melting, not shock or scorch it. Patience here prevents a grainy disaster.
Step 3: Stirring to Silken Smooth Perfection
Stir the mixture constantly and gently with a spatula or wooden spoon. At first, it might look a bit separated, but keep stirring! Watch as the chocolate chips surrender, melting into the thick condensed milk, transforming into a glossy, unified, silken river of pure chocolate potential.
Keep stirring until every last chip has melted and the mixture is completely smooth, thick, and pulls away slightly from the sides of the pan.
Don’t rush this – smooth is the goal! This step is key for that perfect texture in your easy chocolate fudge recipe.
Step 4: Vanilla’s Aromatic Kiss
Remove the saucepan from the heat immediately once smooth. Now, stir in that teaspoon of pure vanilla extract. The warmth of the fudge will bloom the vanilla’s aroma, adding an incredible depth and warmth that perfectly complements the rich chocolate. Stir until it’s fully incorporated – just a few quick folds should do it.
Step 5: The Glorious Pour and Gentle Spread
Now for the satisfying part! Pour the thick, impossibly glossy chocolate mixture into your prepared parchment-lined pan. It will be thick, so use your spatula to gently nudge and spread it evenly, ensuring it reaches all the corners.
Smooth the top as best as you can – though a few gentle swirls look rather lovely too!
Step 6: The Patient Chill – Where Magic Hardens
Carefully transfer the pan to the refrigerator. Now comes the hardest part: waiting! Let the fudge chill, uncovered, for at least 2 hours. It needs this time to firm up completely, achieving that perfect, sliceable, dense-yet-creamy texture.
Resist the urge to poke it too early!
Step 7: Lift, Slice, and Prepare for Rapture!
Once the fudge is firm to the touch, use the parchment paper overhangs to lift the entire block cleanly out of the pan and onto a cutting board. Peel away the parchment paper.
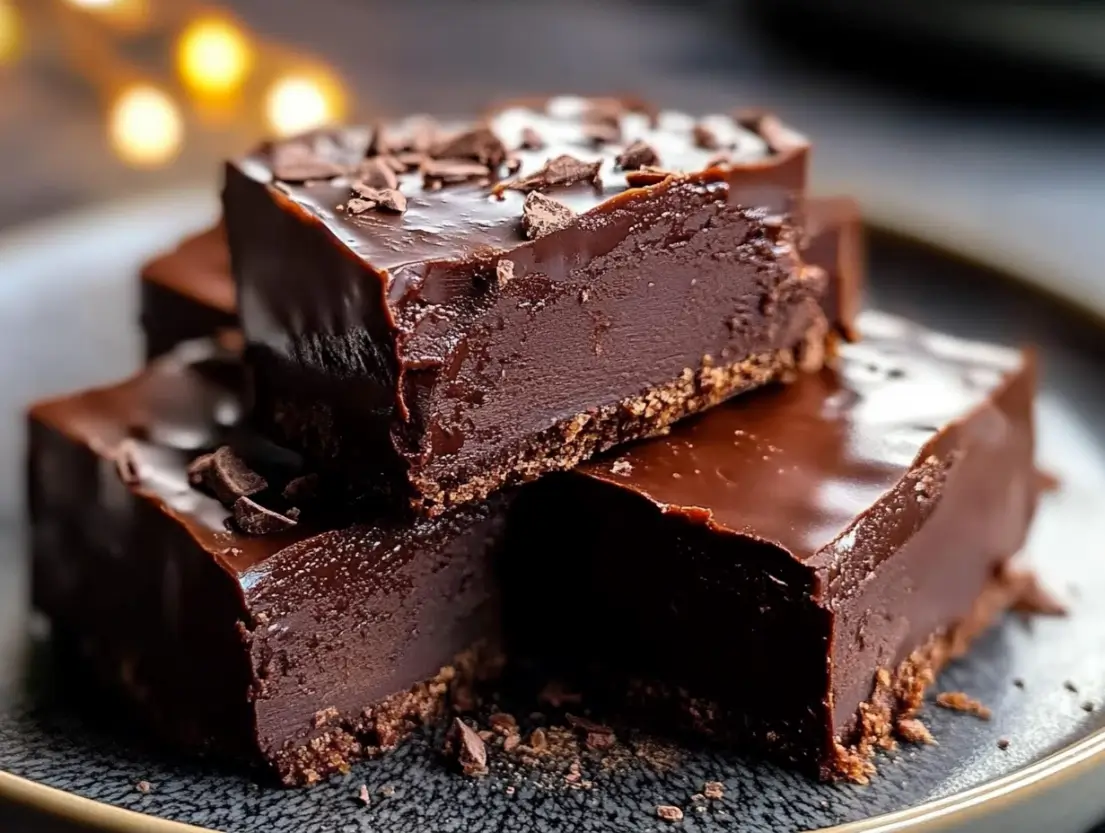
Using a large, sharp knife (running it under hot water and wiping it dry between cuts can help create super clean edges), slice the fudge into small squares. 1-inch or 1.5-inch squares are usually perfect – this stuff is rich! Now, step back, admire your handiwork, and prepare to indulge in the easiest, most delicious homemade fudge ever.
Nutritional Information: A Sweet Reality Check
Let’s be honest, fudge is an indulgence! This easy chocolate fudge recipe is a treat meant to be savoured.
- Estimated Calories: Depending on the size you cut your squares (let’s assume 16 squares from an 8×8 pan), each piece will likely contain around 150-200 calories.
- Indulgence Note: This is a rich, satisfying dessert made with simple, wholesome (in moderation!) ingredients like chocolate and milk. Enjoy it as part of a balanced lifestyle. It’s perfect for special occasions, sharing, or those moments when only decadent chocolate will do. Consider it a delicious investment in happiness!
Healthier Alternatives & Fun Variations
While this recipe thrives on its classic simplicity, you can make small tweaks:
- Lower Sugar: Use high-percentage dark chocolate chips (70% cacao or higher) for a less sweet, more intensely chocolatey flavour. Finding truly delicious sugar-free sweetened condensed milk can be tricky and might alter the texture, so proceed with caution there.
- Dairy-Free/Vegan: Easily done! Use quality dairy-free semi-sweet chocolate chips and a can of full-fat coconut condensed milk (ensure it’s the sweetened condensed kind, not coconut cream). The flavour profile will have a subtle coconut note, which is often delicious!
- Mix-Ins: Feel free to stir in 1/2 cup of chopped nuts (walnuts, pecans), mini marshmallows, or even dried cranberries along with the vanilla extract for added texture and flavour complexity. A sprinkle of flaky sea salt on top before chilling is also divine!

Serving Suggestions: Beyond the Plate
This fudge is fantastic on its own, but why stop there?
- Classic Treat: Arrange squares on a pretty platter for parties or gatherings – a guaranteed crowd-pleaser and perfect holiday treat.
- With Coffee or Tea: The perfect rich counterpoint to a hot beverage.
- Gifting: Pack squares into small cellophane bags tied with ribbon or arrange them in decorative tins. It makes a wonderful, heartfelt homemade gift.
- Dessert Enhancement: Crumble slightly larger pieces over vanilla bean ice cream for an instant fudge sundae experience.
- Dessert Charcuterie Board: Add it alongside cookies, fruit, and cheeses for a stunning sweet spread.
Common Mistakes to Avoid (Yes, Even with an Easy Recipe!)
While this easy chocolate fudge recipe is dubbed foolproof, a few things can trip you up:
- Scorching the Chocolate: Using heat that’s too high is the #1 enemy! Melt low and slow, stirring constantly. If it smells burnt or seizes (gets grainy and thick), it’s likely scorched.
- Grainy Texture: Often caused by overheating or not stirring enough to fully dissolve the sugar crystals in the condensed milk and smoothly incorporate the chocolate. Gentle heat and constant stirring are key.
- Fudge Too Soft: Didn’t chill long enough! Ensure it’s truly firm before attempting to lift and cut. 2 hours is usually the minimum, but depending on your fridge, it might need a little longer.
- Messy Cuts: Chilling thoroughly is the first step. Using a large, sharp knife helps. For extra-clean cuts, run the knife under hot water and wipe it dry between each slice.
Storing Your Homemade Treasure
Proper storage keeps your fudge tasting fresh and avoids texture changes:
- Room Temperature: Store in an airtight container at cool room temperature for up to 3-4 days. Place layers separated by parchment or wax paper to prevent sticking.
- Refrigerator: For longer storage (up to 2 weeks), keep the fudge in an airtight container in the fridge. Note that refrigerated fudge will be firmer. Let it sit at room temperature for 10-15 minutes before serving if you prefer a softer bite.
- Freezing: Yes, you can freeze this fudge! Cut it into portions first, then wrap tightly in plastic wrap, followed by a layer of foil or place it in a freezer-safe airtight container. Freeze for up to 2-3 months. Thaw wrapped portions in the refrigerator overnight for the best texture.
Your Turn to Indulge!
Seriously, could it be any simpler? Rich, creamy, decadent chocolate fudge is literally minutes away from transforming your kitchen into a sweet-smelling haven. This quick & easy chocolate fudge recipe is your golden ticket.
No candy thermometers, no complicated techniques, just pure, unadulterated chocolate bliss. Don’t just read about it – grab those three simple ingredients and make it! Whip up a batch today and discover just how easy (and incredibly rewarding) homemade fudge can be. Satisfy that sweet tooth now!
Fudge FAQs: Your Burning Questions Answered
- Can I use almond flour in this recipe?
No, almond flour isn’t used in traditional fudge and isn’t part of this recipe. This fudge relies on the interaction between chocolate and sweetened condensed milk for its structure and texture. - Can I freeze this fudge?
Absolutely! As mentioned in the storing tips, cut it into squares, wrap well (plastic wrap + foil or an airtight container), and freeze for up to 3 months. Thaw in the fridge. - Can I use milk chocolate or white chocolate chips instead?
Yes, you can experiment! Milk chocolate will result in a sweeter, milder fudge. White chocolate fudge is also possible, but white chocolate can be more temperamental when melting – use very low heat and be extra careful not to scorch it. The texture might be slightly softer. - Why is my fudge grainy or oily?
Graininess is usually caused by heating the mixture too quickly or not stirring enough, preventing smooth incorporation. Oiliness can sometimes happen if the mixture separates due to overheating. Low heat and constant, gentle stirring are crucial! - Can I double this recipe?
Yes, you can double the ingredients and use a larger pan (like a 9×13 inch pan). Just ensure your saucepan is large enough to handle the volume comfortably during the melting and stirring stage. Chilling time might need to be slightly longer.
Easy Chocolate Fudge
- Total Time: 130 minutes
- Yield: 16 servings 1x
- Diet: Vegetarian
Description
This easy chocolate fudge recipe guarantees decadent, melt-in-your-mouth results with minimal ingredients and simple steps.
Ingredients
- 2 cups semi-sweet chocolate chips (approx 12oz)
- 1 can sweetened condensed milk (14oz)
- 1 teaspoon pure vanilla extract
Instructions
- Line an 8×8 inch baking pan with parchment paper, leaving overhang on two sides.
- Combine chocolate chips and sweetened condensed milk in a medium saucepan over low heat, stirring constantly until melted and smooth.
- Stir in vanilla extract until fully incorporated.
- Pour the mixture into the prepared pan, smoothing the top.
- Chill uncovered in the refrigerator for at least 2 hours.
- Lift out of pan using parchment overhang, slice into squares, and enjoy.
Notes
Store in an airtight container at room temperature for up to 3-4 days or in the refrigerator for up to 2 weeks.
- Prep Time: 10 minutes
- Cook Time: 10 minutes
- Category: Dessert
- Method: No-Bake
- Cuisine: American
Nutrition
- Serving Size: 1 square
- Calories: 175
- Sugar: 24g
- Sodium: 100mg
- Fat: 7g
- Saturated Fat: 4g
- Unsaturated Fat: 3g
- Trans Fat: 0g
- Carbohydrates: 24g
- Fiber: 1g
- Protein: 2g
- Cholesterol: 5mg


